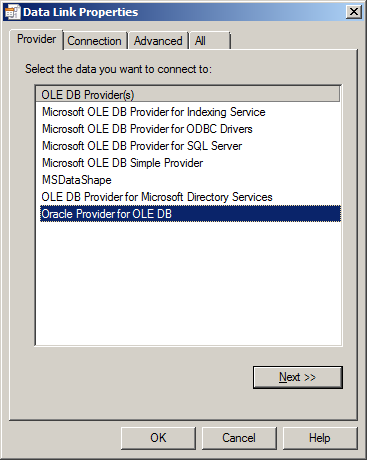
Create a new Text Document, and rename it with "udl" extension (e.g. DSN001.udl). And then open this file, click the Provider Tab, select Oracle Provider for OLE DB and then click Next
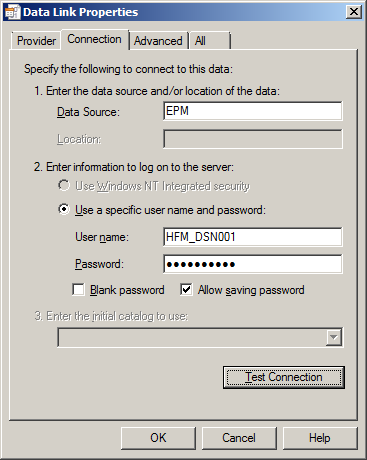
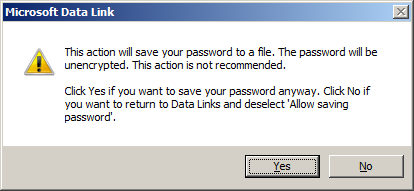
In Connection Tab, input your Data Source Name and input User name and Password for the Destination Database. Check Allow saving password and then click Test Connection.
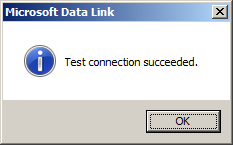
Displayed Test connection succeeded.
And the you can click OK to save the profile, click Yes to continue.
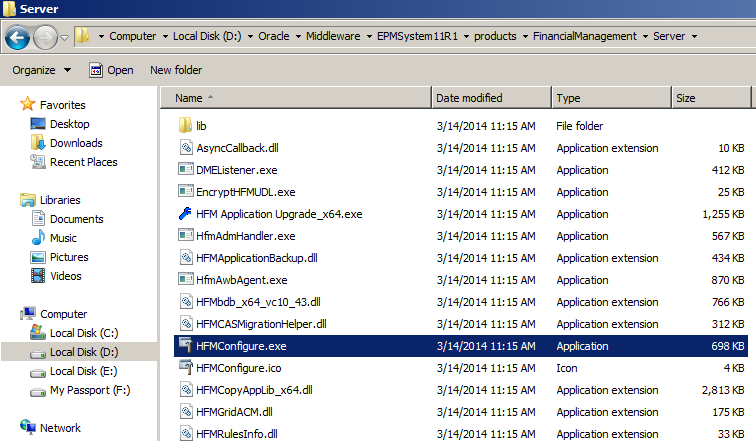
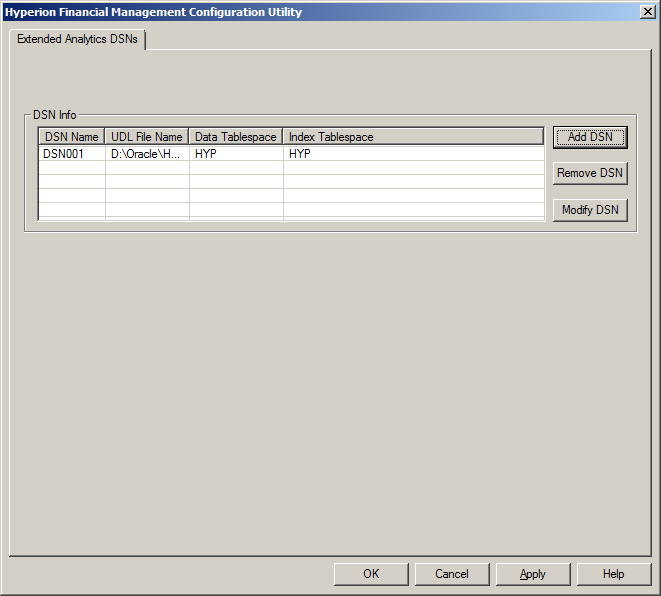
In your HFM server, go to the folder D:\Oracle\Middleware\EPMSystem11R1\products\FinancialManagement\Server, and found the utility called HFMConfigure.exe.
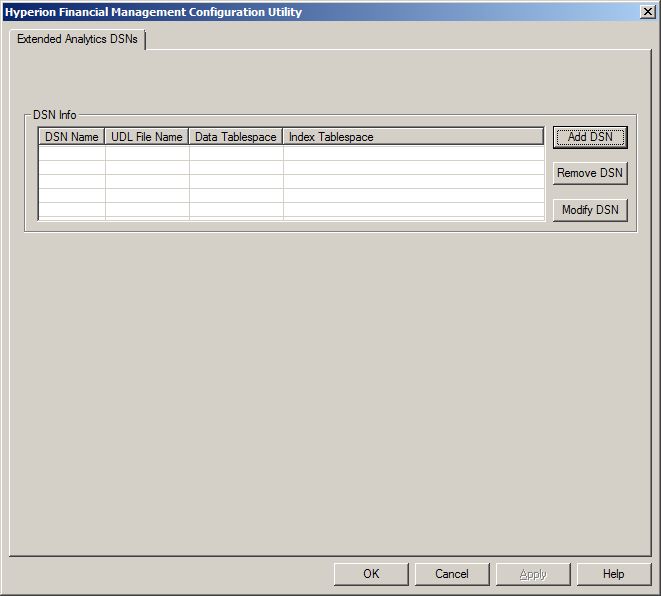
Double click to open the utility, and you can define Extended Analytics DSNs here. Click Add DSN.
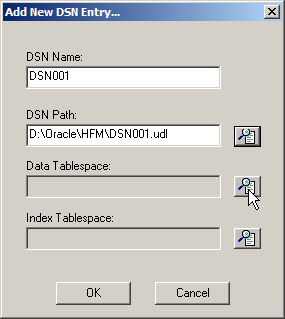
Input the DSN Name, and then click to select the DSN Path
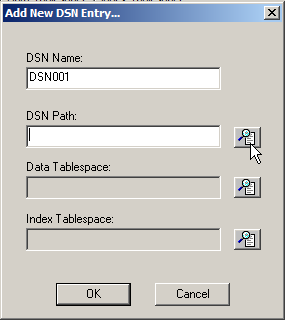
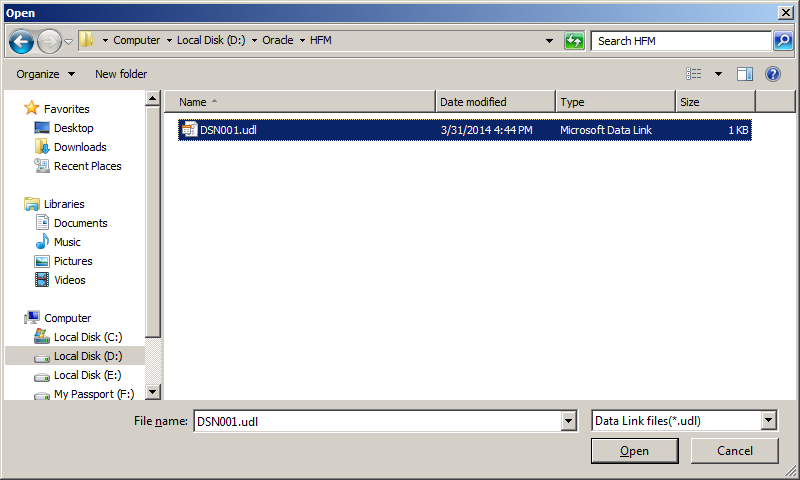
Find the udl file saved before.
Then click to select Data Tablespace.
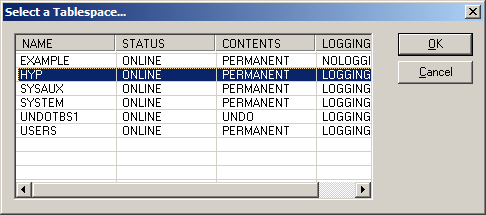
Select your preferred Tablespace.
Same step to select the Index Tablespace and then click OK to save.
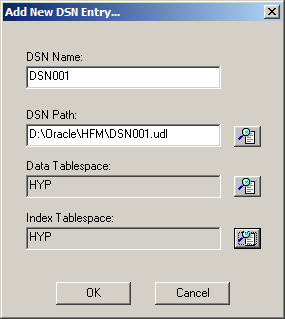
Then you can find your DSN created successfully.
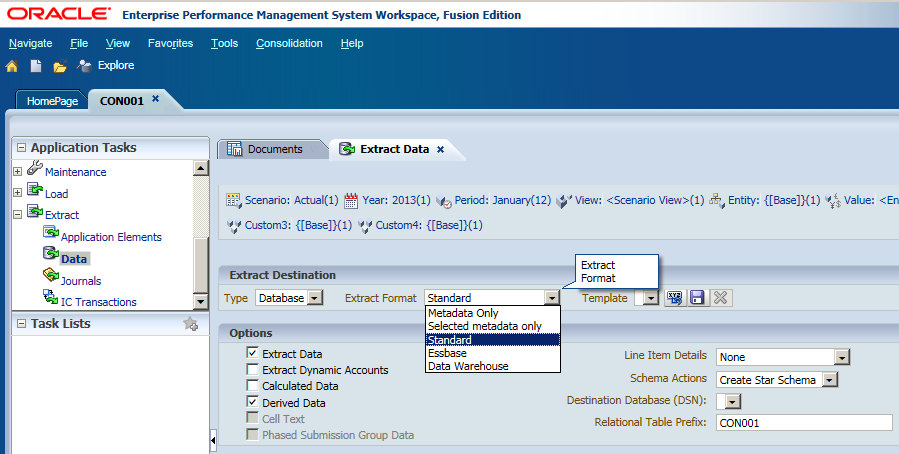
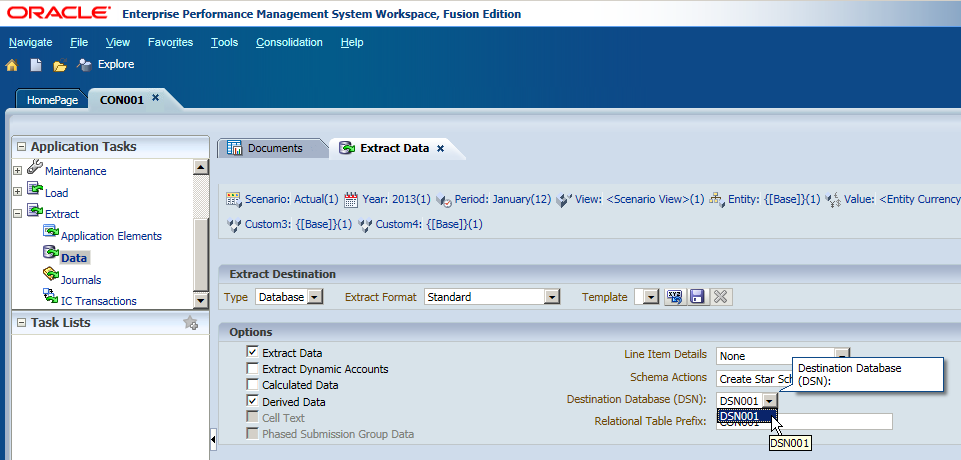
Now login to HFM and locate to Extract Data. Select Extract Type to Database and Extract Format to Standard. Now you can select the DSN you defined before.
You can save the setting as a template which you can reuse it next time, click Save Template.
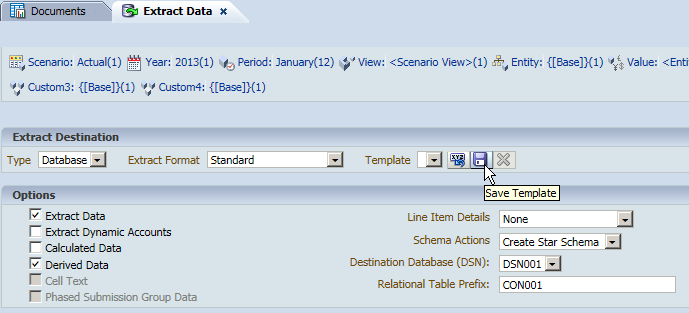
Input the Template Name and click OK.

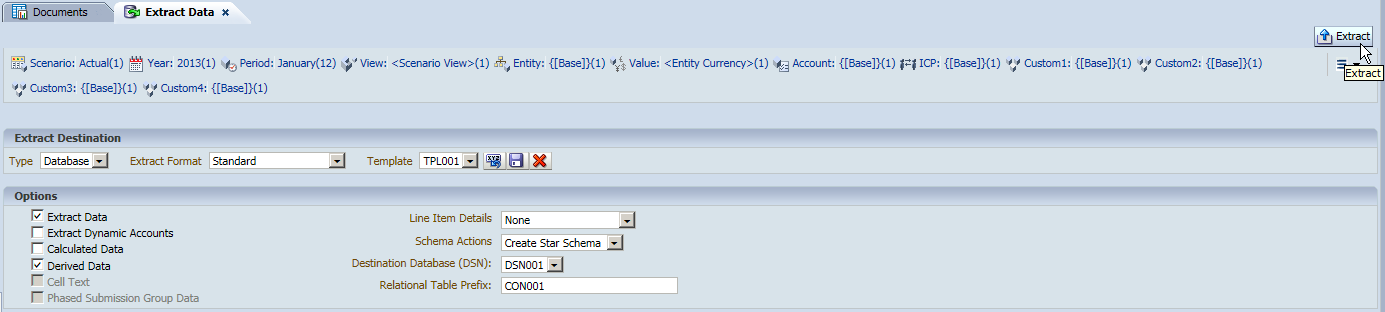
After that, you can click Extract to launch the task.
You can view the running task and the progress of it.
After the task's progress reached 100%, you can check the extract result in the relational database. You can find all the Dimensions are extracted with the member attributes.
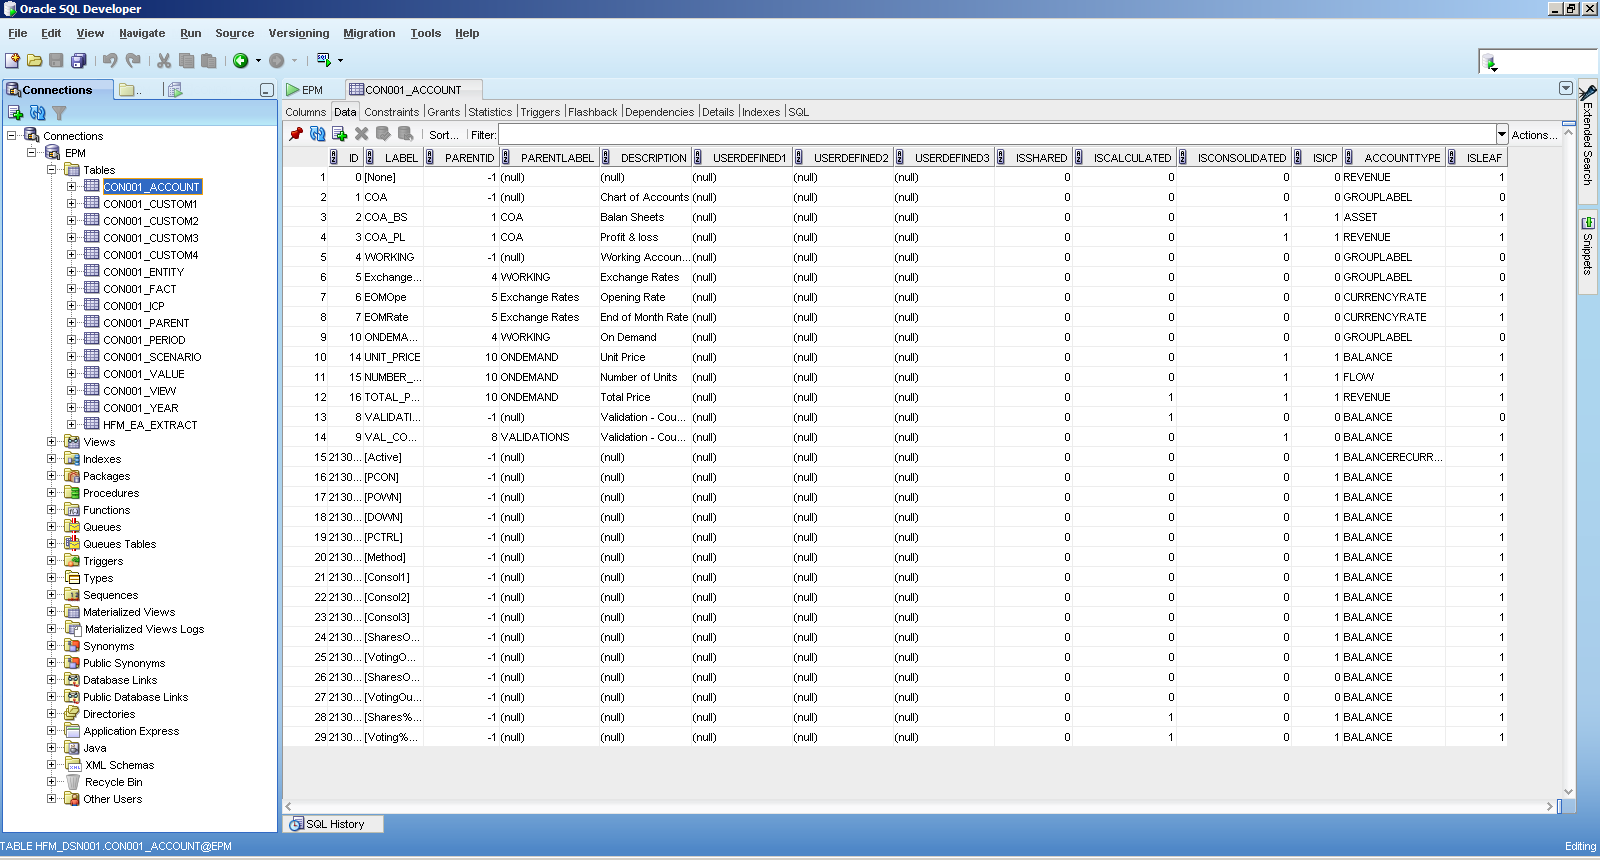
The fact data is stored in the table CON001_FACT.

Hi Martin,
ReplyDeleteThank you so much for provided good information
Is it possible to make available all screen shots. I am unable to view 4 screen shots
Hi, I'm not sure which screen shots you can't see. Because I can see all in my screen. Thanks!
ReplyDeleteHi Martin, Is it possible to only extract the Data in one unique table with a unique Point of View instead of extracting all the dimensions and a FACT table with the Point of View. If you could please hit me up it would be perfect.
ReplyDeleteocarrasco@tactickco.com
Hi Oriol, I think you can custom a view in the relational database based on the dimension and fact tables.
DeleteHi Martin,
DeleteThank you for the response.
I have some further questions, when you mention the relational database do you mean the destination database?
Furthermore, do you reckon it is possible to create a JOIN in the SQL Developer in order to just get the POV we are searching for?
Keep in touch!
This comment has been removed by the author.
ReplyDeleteYes I meant the destination table. However, I didn't try that before but just for your reference.
ReplyDeleteHi , Where does template name get stored please.
ReplyDeleteThanks,
Joe
What template you are mentioning about?
DeleteIs there a place to see al templates saved regardless of users? I "lost" a templae because I don't remember the user which is tied to...
DeleteHi Martin, is it possible to schedule the extract as a job so we can feed the data to the downstream consumers on a regular basis?
ReplyDeleteThank you.
Hi Martin, I'm using HFM 11.1.2.3.0 ,I use the extract data,but it can not extract the dynamic account. Is it a bug ? If it is, which path do I need to upgrade? thank you very much,RSVP
ReplyDeleteI tried all step, but I don't understand why after extract success, I check the database tabel fact there is no data?
ReplyDelete