Tuesday, March 31, 2015

HFM 11.1.2.4 (1) - New features

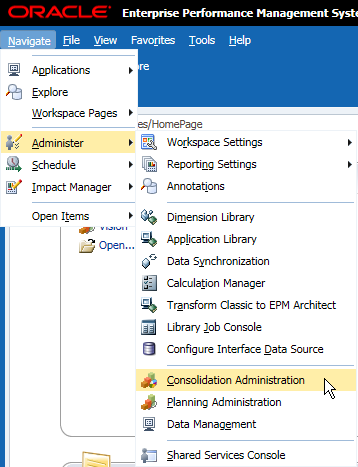
You now create and edit application profiles on the Web instead of HFM client only. Login to Workspace > Administer > Consolidation Administration


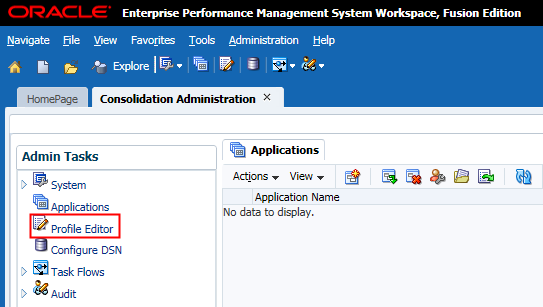
Double click "Profile Editor" in the Admin Tasks

Then you can create a new application profile or edit an existing one. Click OK to continue.


The steps are similar as before, click "Add" to add new languages of the profile.


Input the language name, and click "Add" to add more if you need multiple languages. After all the languages are added, click Next to move to next setting page.


In the Calendar setting page, same setting as before. Click Next to continue.


In the Frequencies page, set the description of the frequencies. Click Next to continue.


In the Periods page, set the descriptions of the member of period dimension. Click Next to continue.
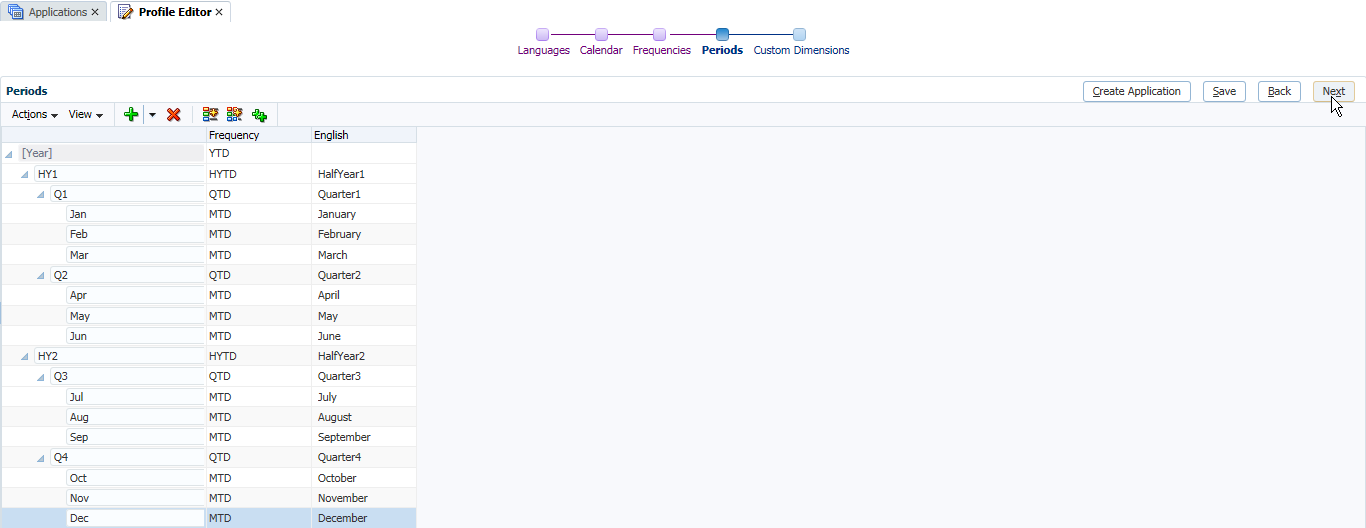

In the Custom Dimensions page, there are 2 preset dimensions (C1, C2). The Dimension Size of them is large for them, which cannot be modified. You can add more custom dimensions as below, and select the dimension size for them. Click Save to save the profile file.


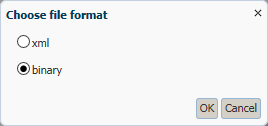
In this version, there are two types of file format you can select to save. One is xml, the other is binary. The binary one will have the *.per extension, which is the same as the previous versions. Select one of the file format and then click OK to save.

Then you can click "Create Application" to create an HFM application.


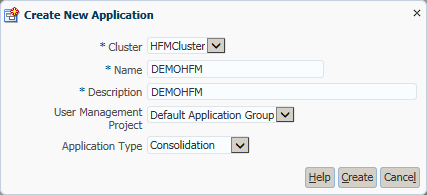
Select the Cluster of HFM, input the Name and Description of it. Select the User Management Project and select the Consolidation Application Type. Click Create to continue.

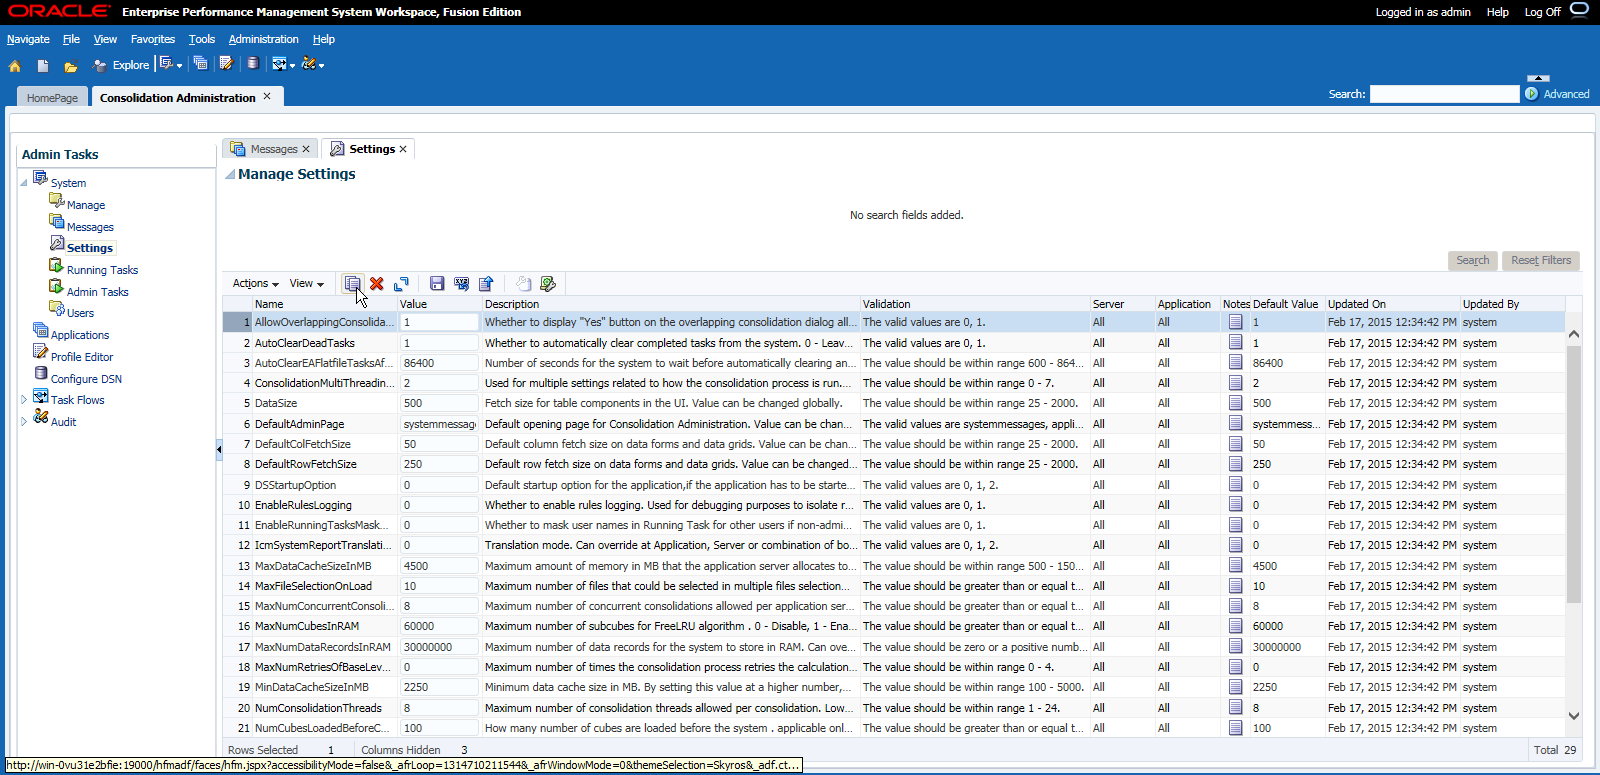
After the application is create, you can manage the HFM setting at the server/cluster level or individual application levvel. Expand System and double click the Settings in the Admin Tasks. You can change the configuration settings in the HFM UI as below. It is a new feature of HFM of this version as well.

In this new version, load screens have been enhanced to enable you to select multiple files to load simultaneously. The new multi-selection option is available in Load Data, Load Documents, Load Journals, and Load Intercompany Transactions. Take Load Data as example, once you select multiple data files to load, click "Load" to continue.
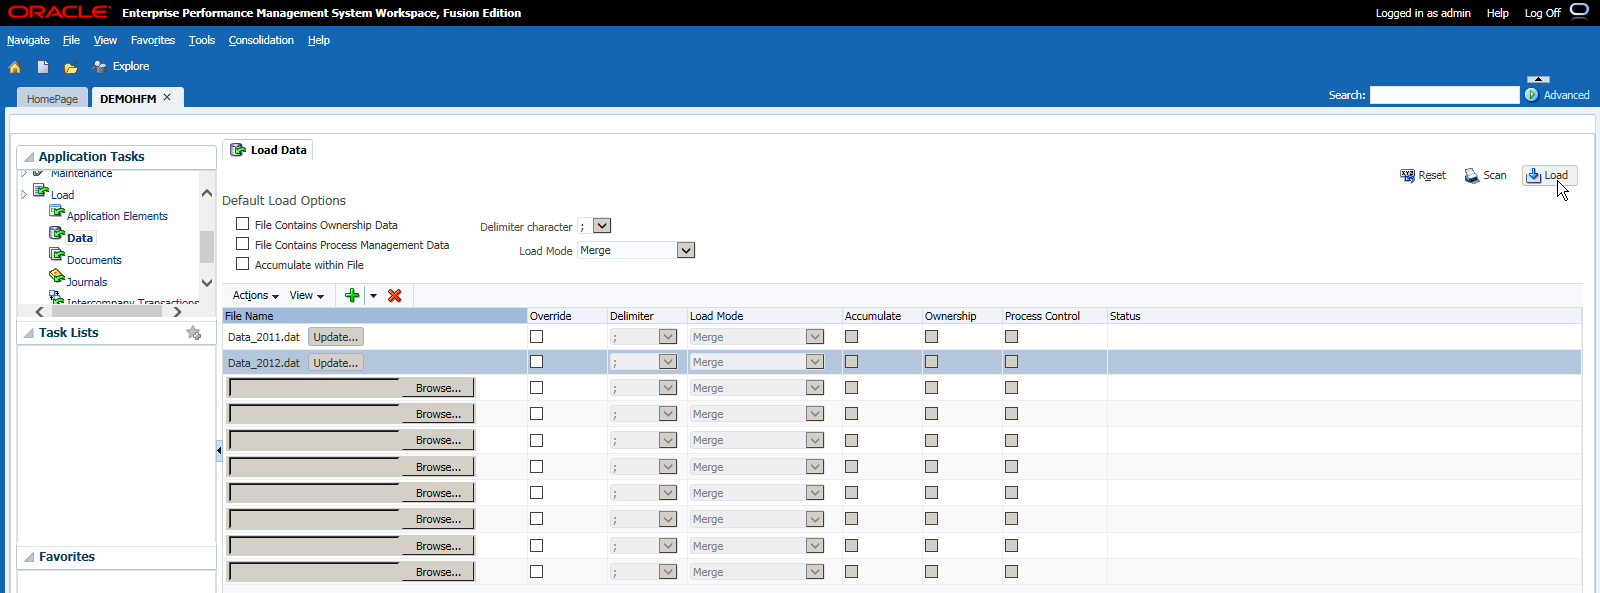

You can find the data files can be loaded to HFM in serial. And once it is completed, you can find the result as below. (In the previous versions, you can only load one file at the same time.)

Thursday, March 26, 2015

Planning 11.1.2.4 (3) - Dynamic Dimension Members

In Hyperion Planning 11.1.2.4, the "Member on the Fly" functionality is available and not only limit to Workforce Planning, Capital Asset Planning, Project Financial Planning and Public Sector Budgeting customers.

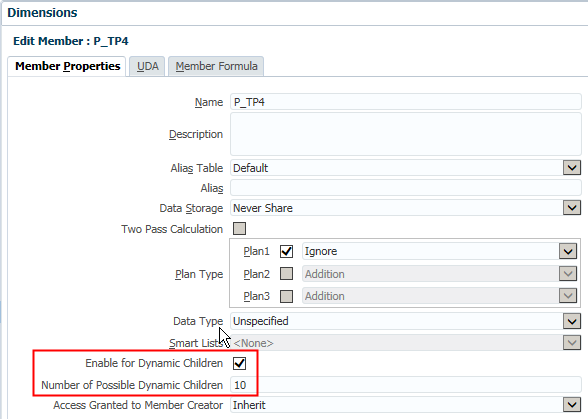
In the dimensions page of Planning application, select the member that you want to enable for dynamic children. Check the option "Enable for Dynamic Children" on, and input the Number of Possible Dynamic Children (By default is 10). Note that it is not the children number that limit to the parent but the limit number that can only add one time before refresh to Essbase. I will explain more detail later.


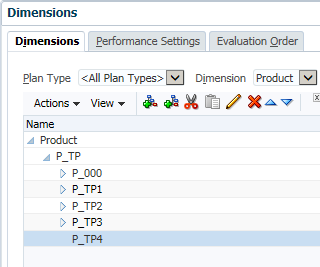
Here is the hierarchy that you can see in the Planning interface, no children are added at this moment.


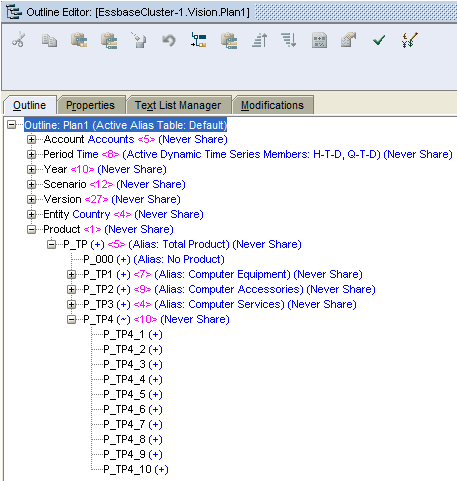
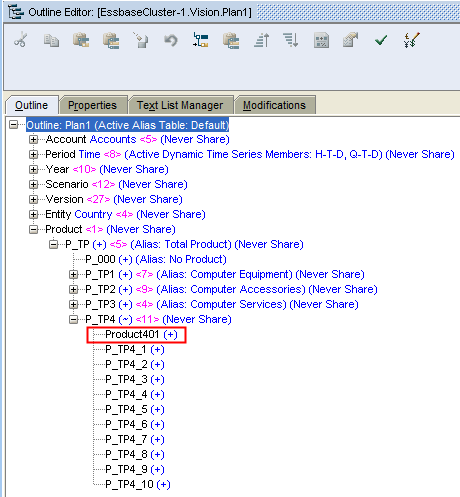
After refresh the data to Essbase, open EAS and you can find 10 "placeholders" are added to the parent.


Hyperion Planning uses business rules to trigger the dynamic members management, add or delete members. So before you can use the dynamic dimension members feature you need to go to Calculation Manager to create a business rule.

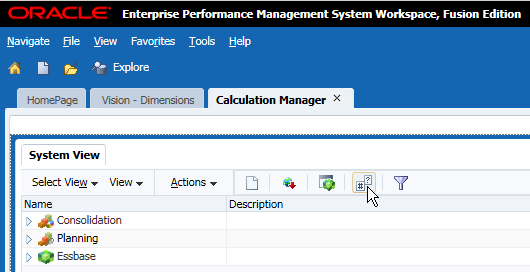
We need a runtime prompt variable for entering new member name, click Variable button to open Variable Designer.


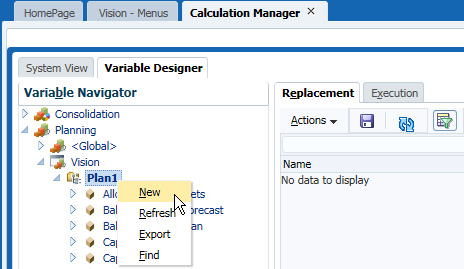
Find out the application and plan type that you want to add the variable then create a new one.


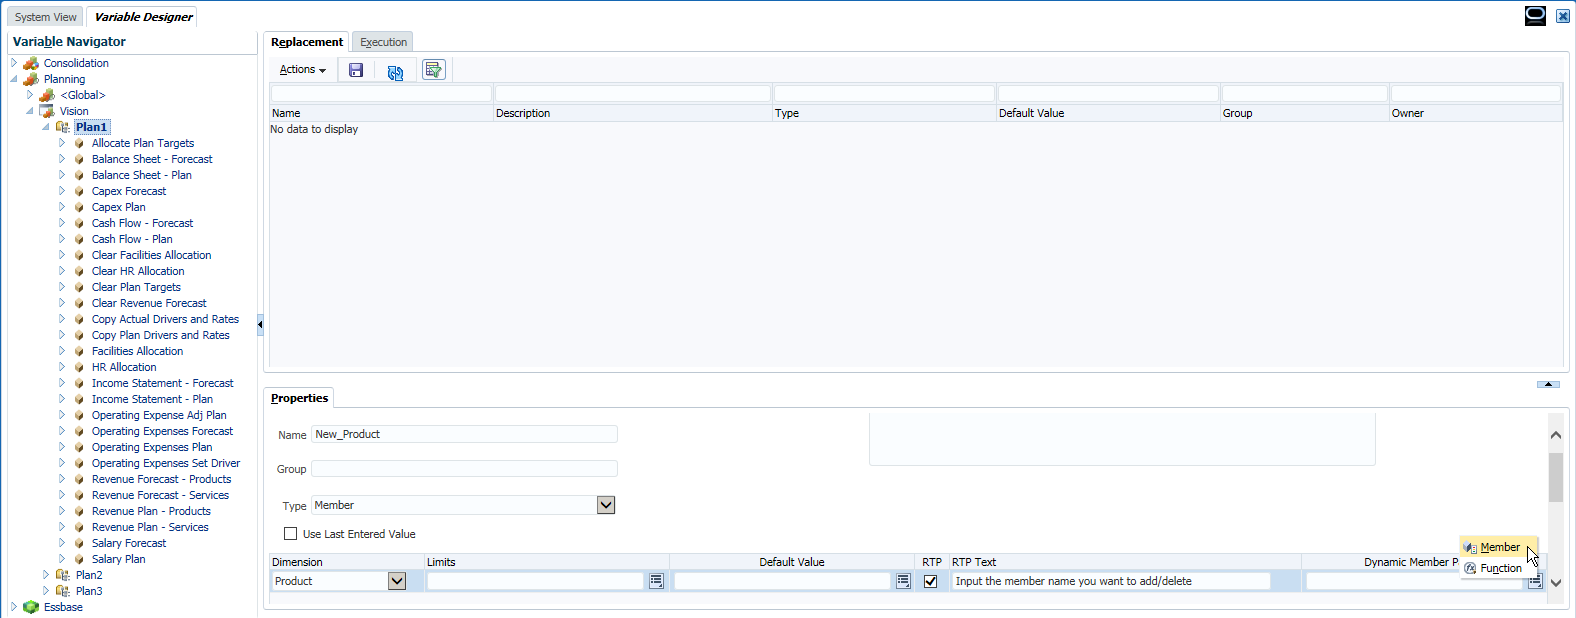
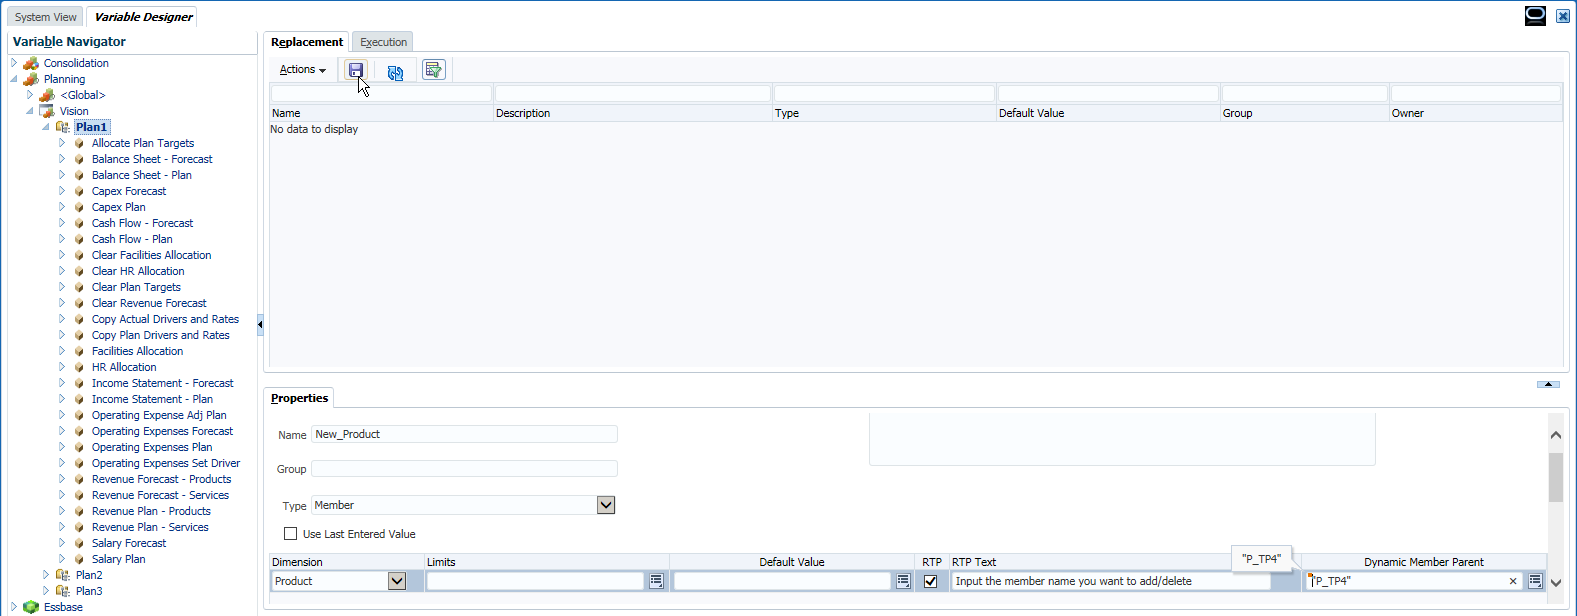
Input the variable name, select the Type as Member. Select the dimension for the member, check RTP on and input RTP Text. Then select the Member of Dynamic Member Parent.


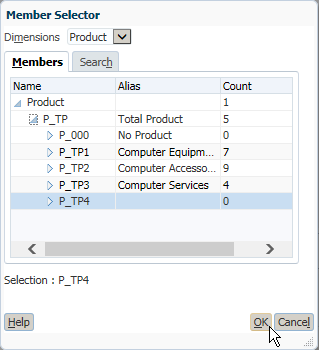
Select the Member for the Dynamic Member Parent and press OK.


Save the variable and continue.


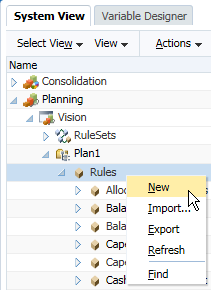
Then switch to the System View of Calculation Manager, create a new business rule.


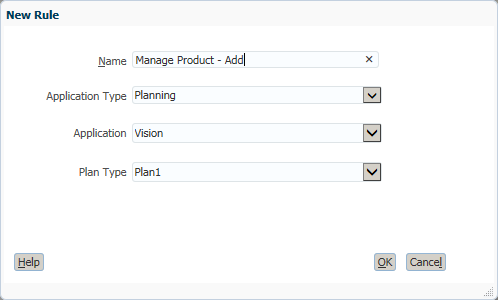
Input the business rule's name and press OK.


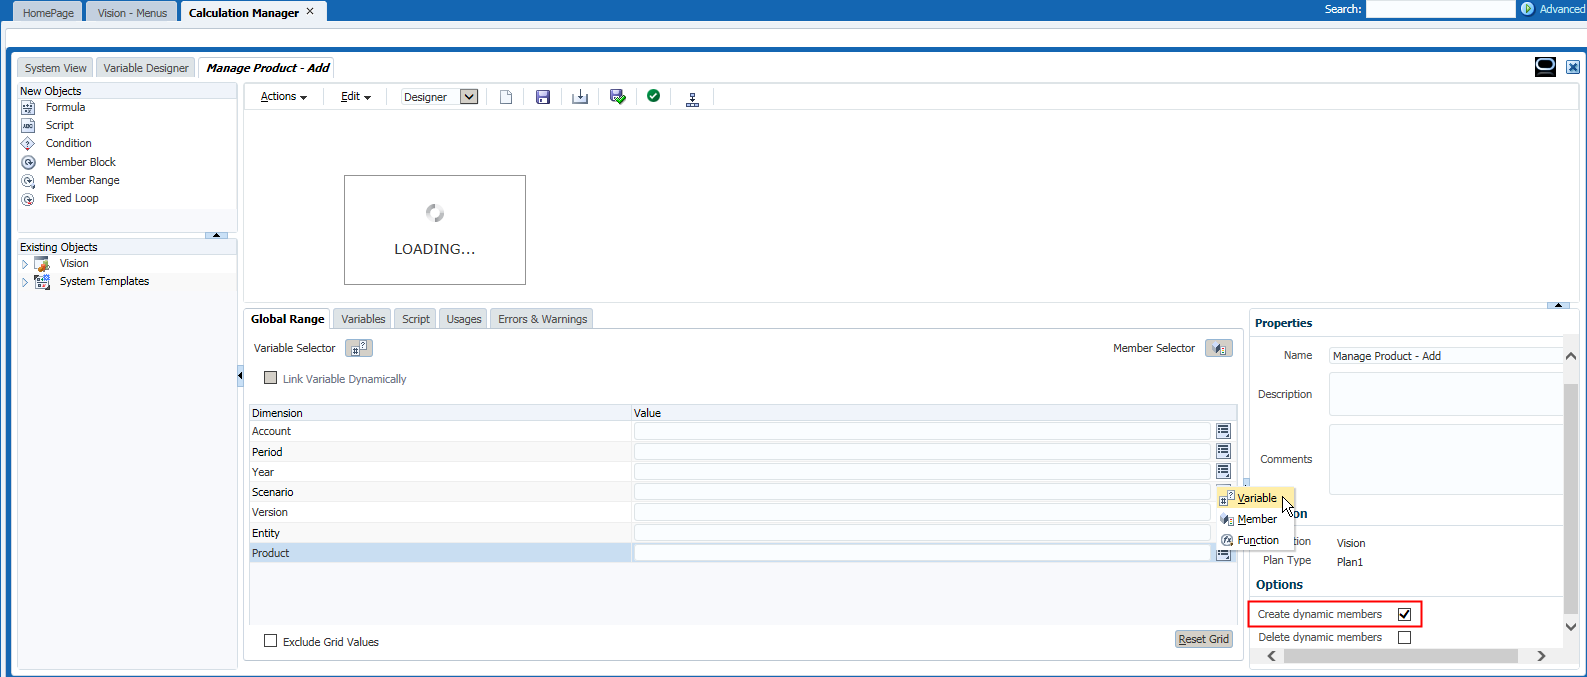
Check the box "Create dynamic members", and then select Variable for the dimension.


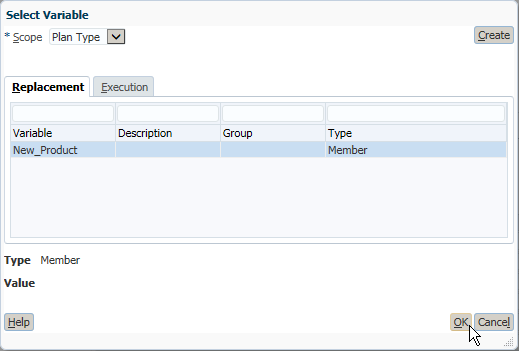
Select the new added variable and then press OK.


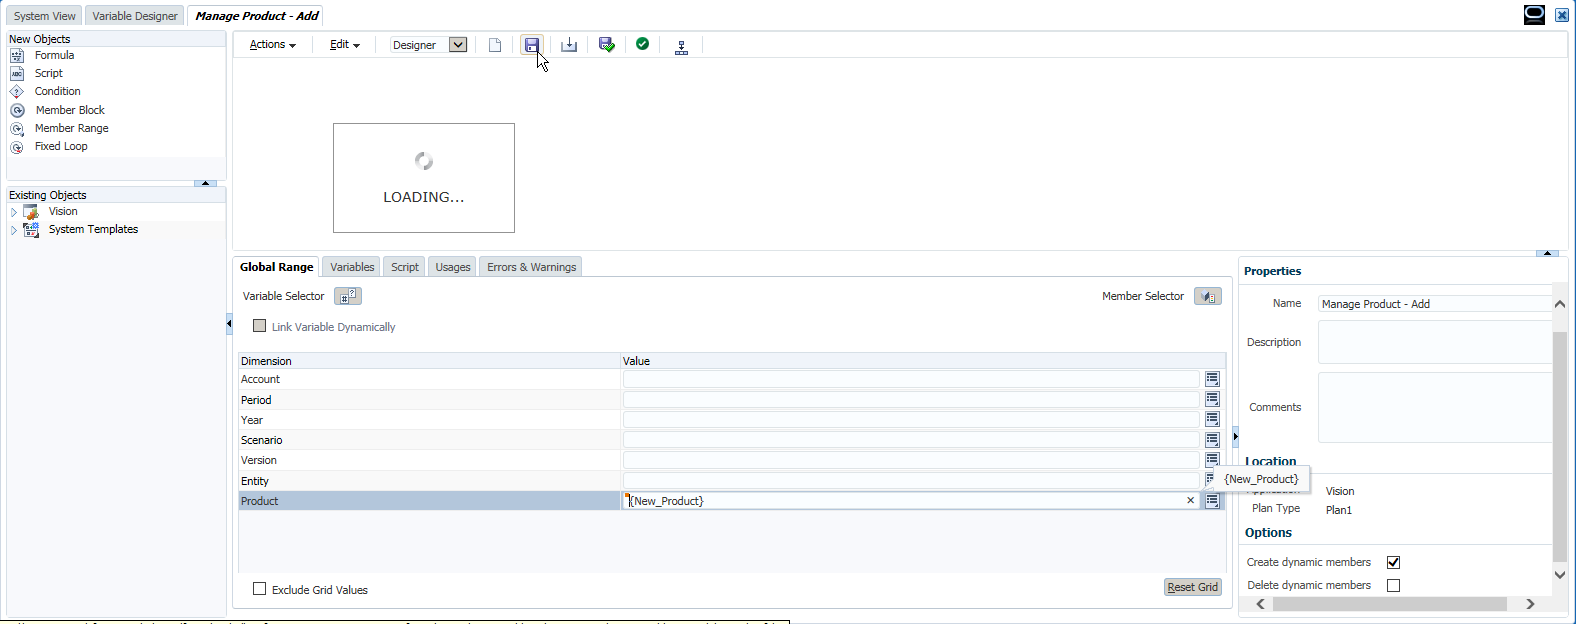
Save the business rule.


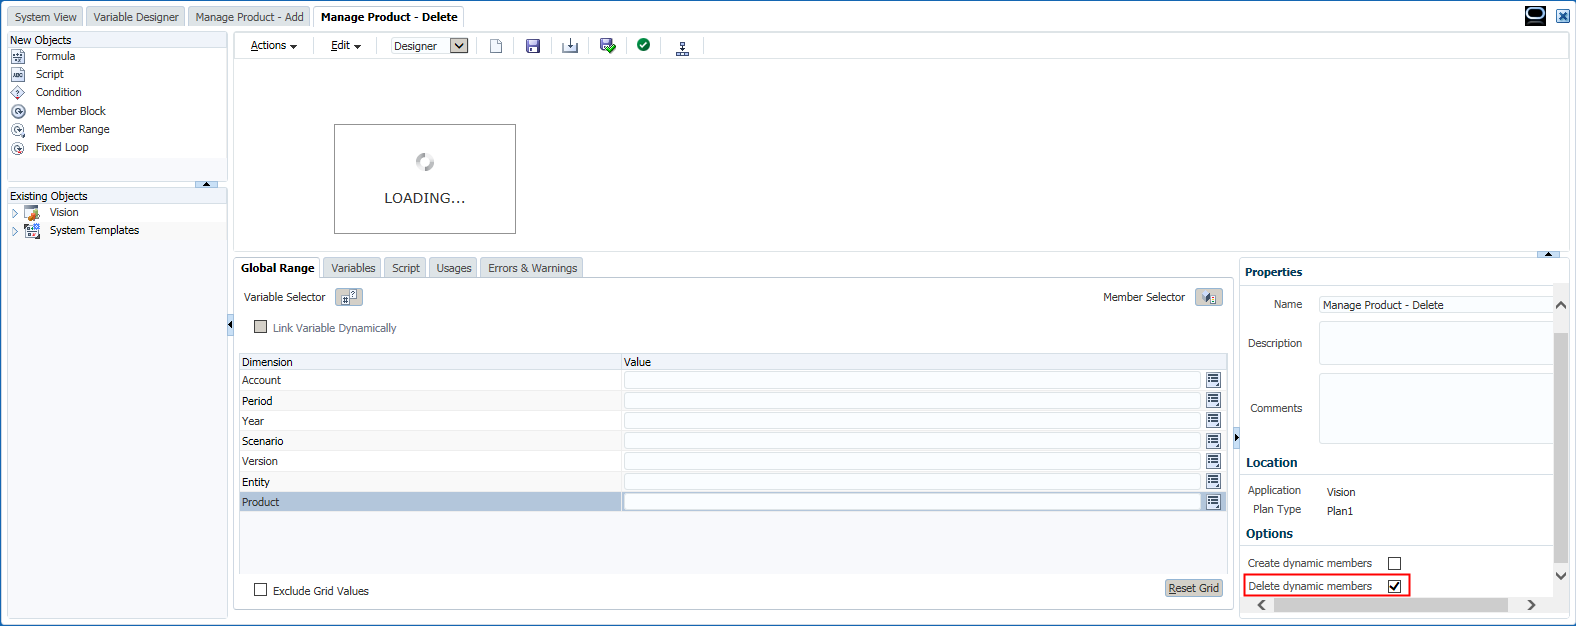
Create another business rule, repeat the steps as above but check "Delete dynamic members" this time.


After these two business rules are saved, deploy them to Hyperion Planning.

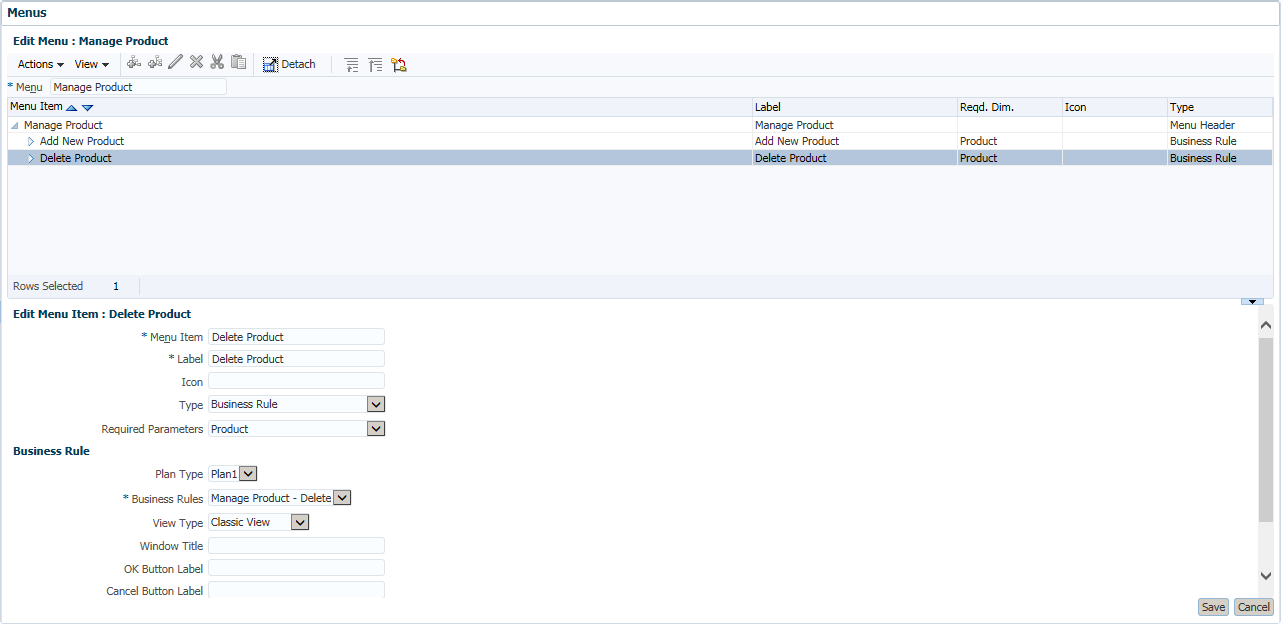
Business rules are not very convenient to run directly in web forms, so we can create a menu to call them by right-click. Create the menu as below.


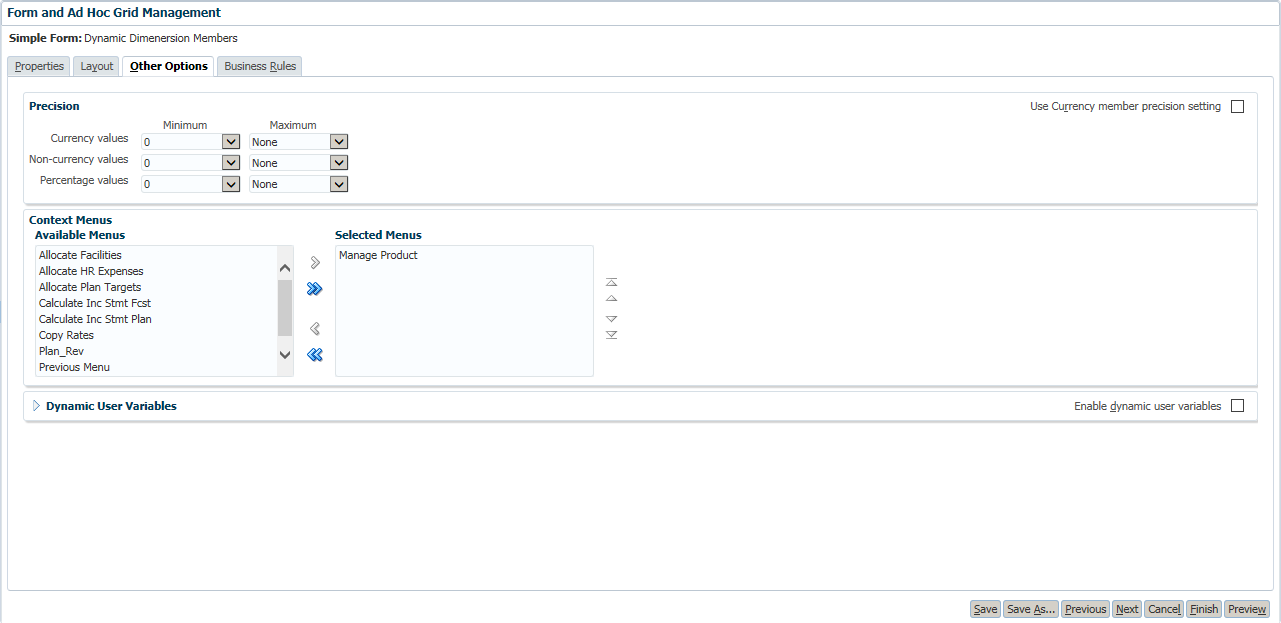
Then associate the menu to the demo form.


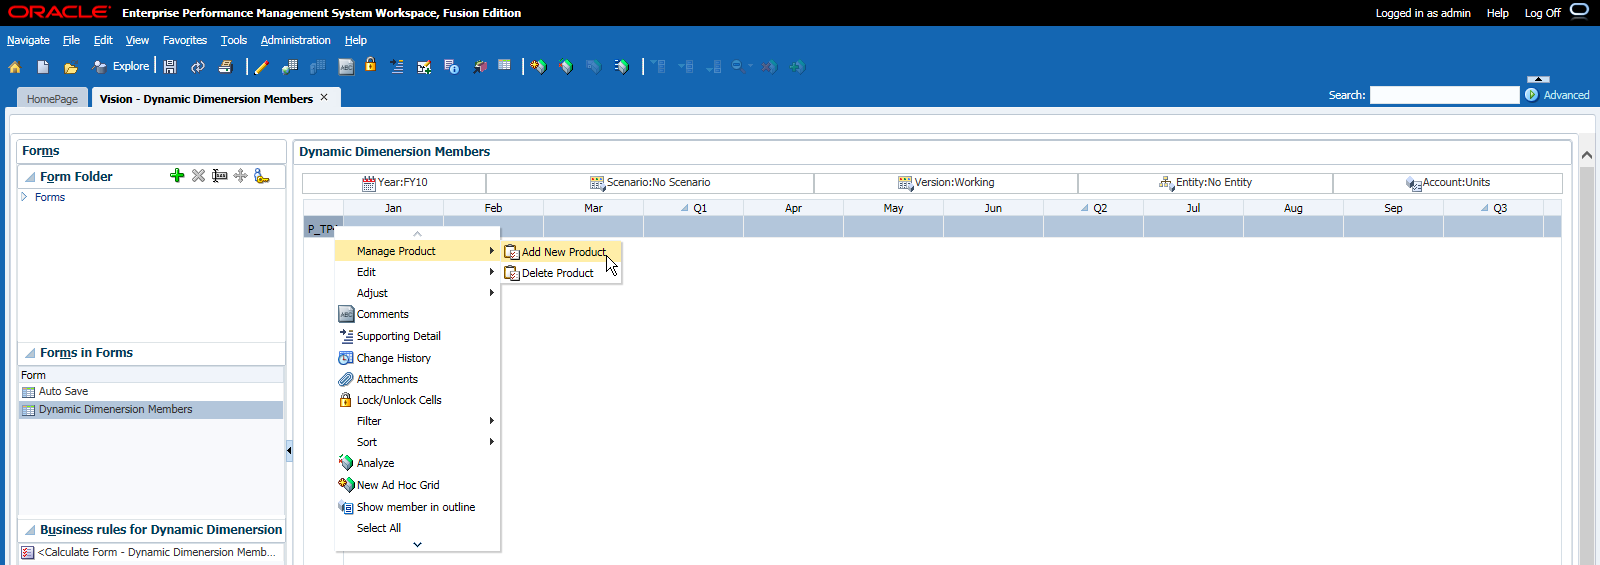
Now you can open the demo form and then right-click the product dimension member as below. Select Add New Product in the menu.


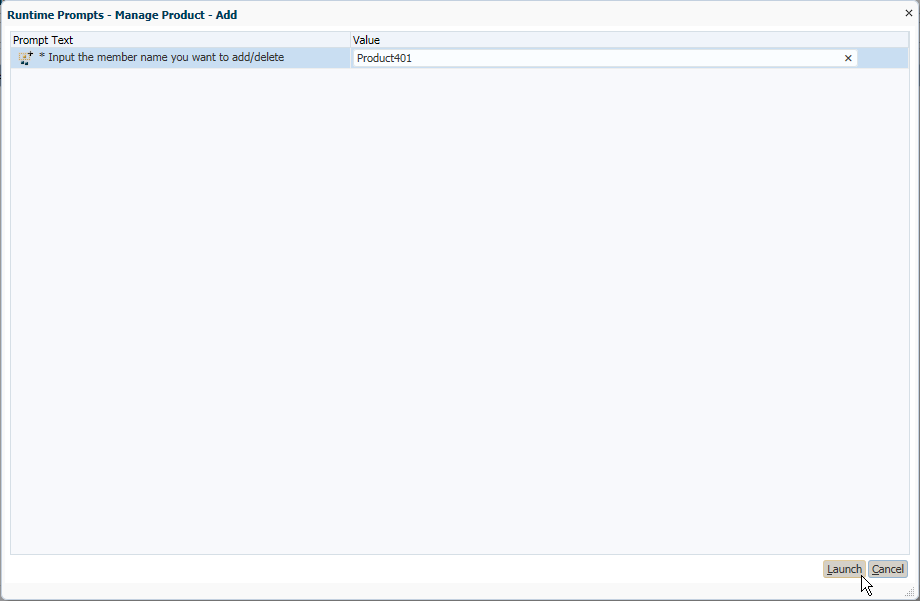
Input the name that you want to add, then press Launch.


Without refresh to Essbase, you can input data directly in the web form of the new added member.


Let's have a look what's happening in Essbase actually. Open Smart View and connect to Essbase directly, you can find the data is stored in the placeholder #1 this moment. You cannot find the shadow of the member just added before.


Then what will happen when I refresh to Essbase, you can find in EAS below.


Now let's take a look at Smart View data in Essbase again. This time the data has been transferred to the new added member, and the placeholder #1 was reset to #Missing.


We can add at most 10 members (The number we set in the dimension member property page) in one time before refreshing to Essbase. If we continue to add more the following error message will come out because we have only 10 placeholders in the back-end Essbase. But we can continue to add more after we refresh to Essbase because the placeholders are released.


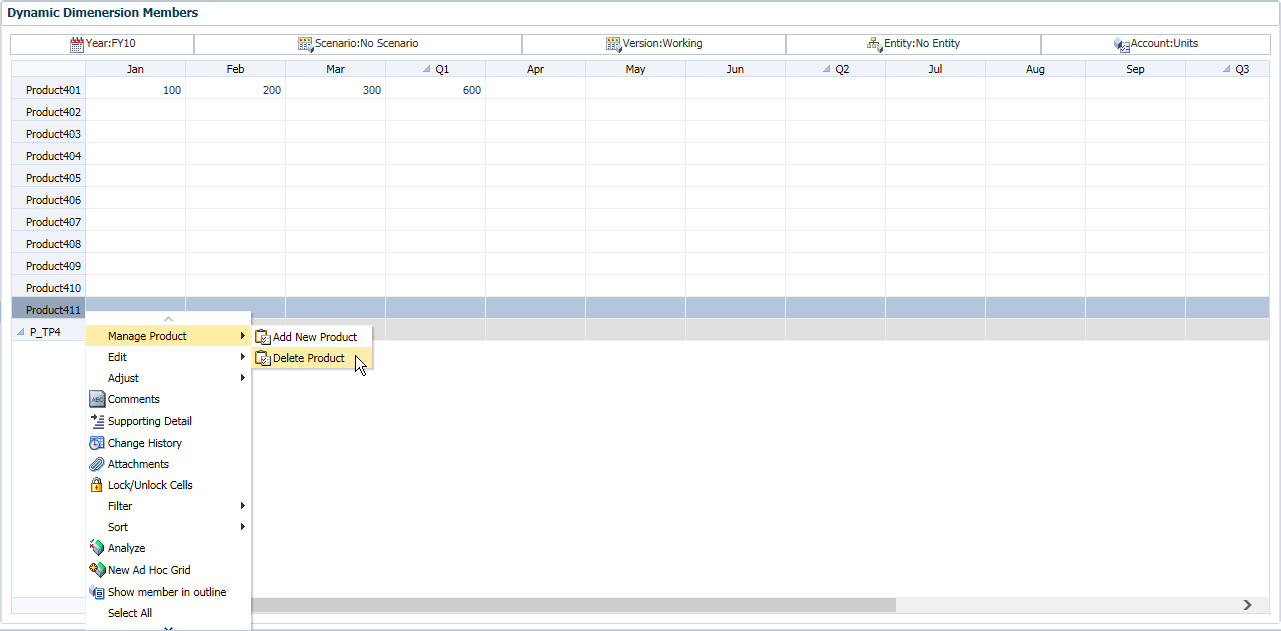
If you want to delete the new added members, highlight the member that you want to delete, select Delete Product in the right-click menu.


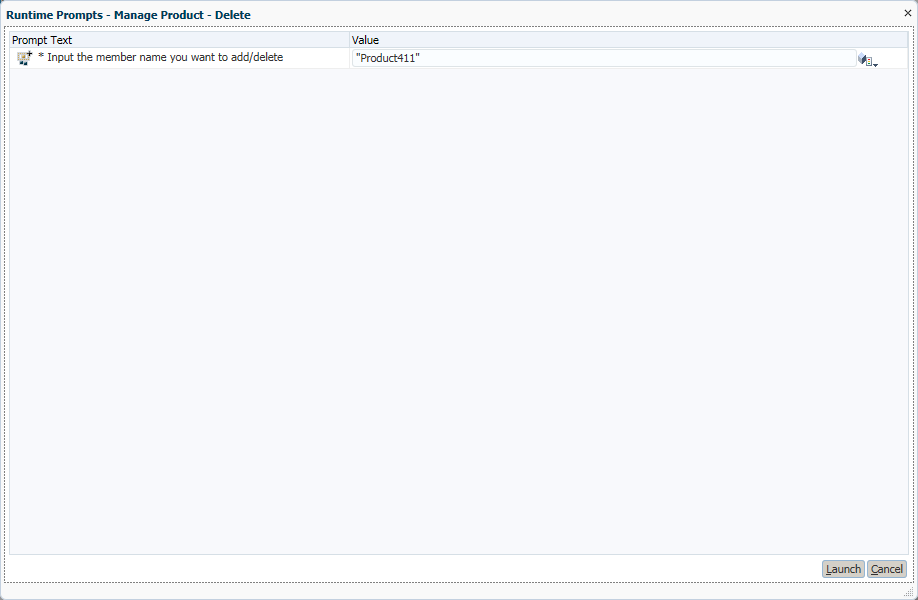
Press Launch to delete it.


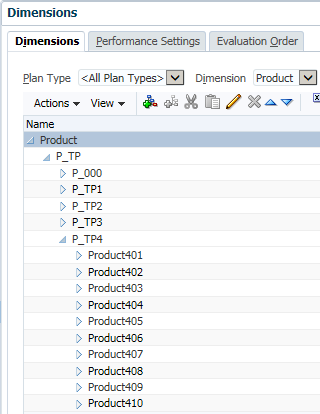
Now you can find the member is deleted as below.


That's the layout in the Planning interface. The members are dynamically added by the business rules, which means the basic planners can add members on the fly now.

Wednesday, March 25, 2015

Planning 11.1.2.4 (2) - Auto Save

Hyperion Planning 11.1.2.4 has a new feature called Automatic Save, which can save data automatically in web form when move out of a cell. This feature is only applied to Simplified Interface, but not the original web interface.

Before the setting of Automatic Save is done, user inputs data in cell and the cell displayed in yellow when move out as usual.


The data has not yet been saved. When you click on the Refresh button, the following message shows out.


And when you save the data, the sub total of products can not calculated automatically.


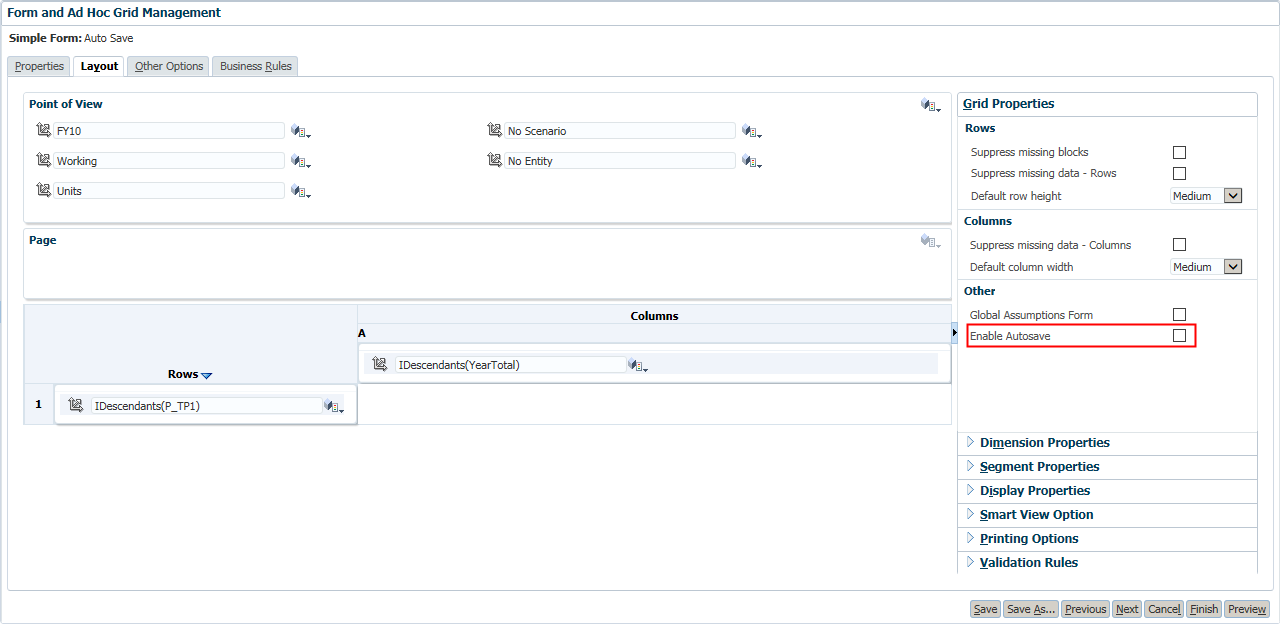
Let's move to the design page of the web form, check the option Enable Autosave on.


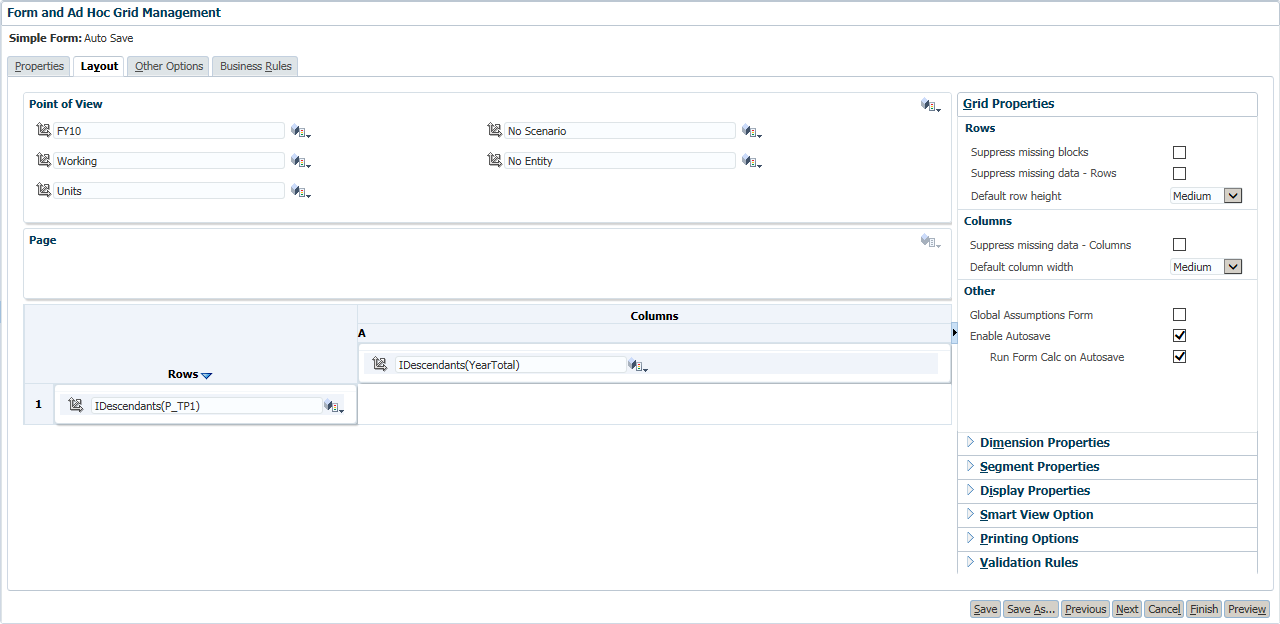
Then you can find the option "Run Form Calc on Autosave" prompt out, also check it on.


Then return to the form page in Simplified Interface. This time when you edit data and move out of the cell, the cell will display in green. And also, the sub total of products can be calculated automatically.


You can press Ctrl+Z to Undo the previous action.


Another new feature is that you can edit the cells format in the Simplified Interface. Click the Format tab in the right hand side, select the cells that you want to change the format and then set the format for them. Remember to click "Save Formatting" to save the effect.


You can only edit the cells format in Simplified Interface, but you can also review the effect in the original web interface.