Monday, November 17, 2014

Essbase - Load and Export SQL Data

Essbase can load and export data from/to relational database directly. Need to configure the ODBC driver before the data load and export.


  • Configuring Data Sources on Windows
In the Windows Server, select Start, then Administrative Tools, and then Data Sources (ODBC).


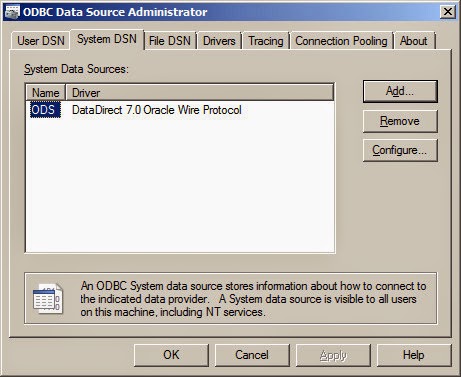
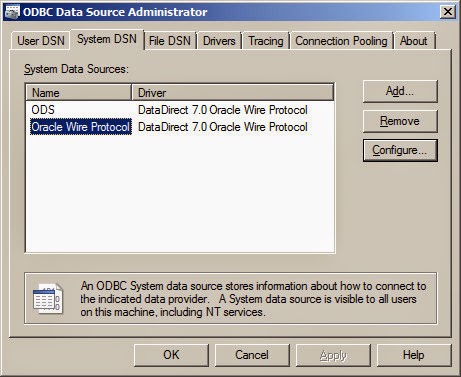
Select "System DSN", you can find a system data source called ODS was already here. It is the DataDirect ODBC drivers provided by the Essbase installation. You can click "Add..." to add another data source.

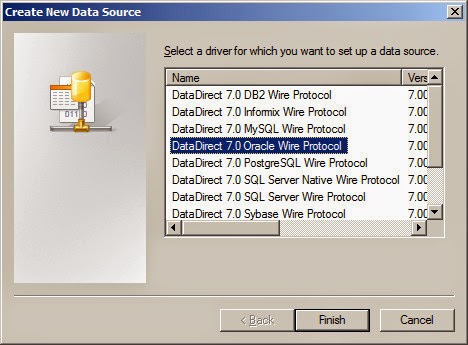
If your data source is Oracle, select DataDirect 7.0 Oracle Wire Protocol (Or other data source for other database) and then click "Finish".


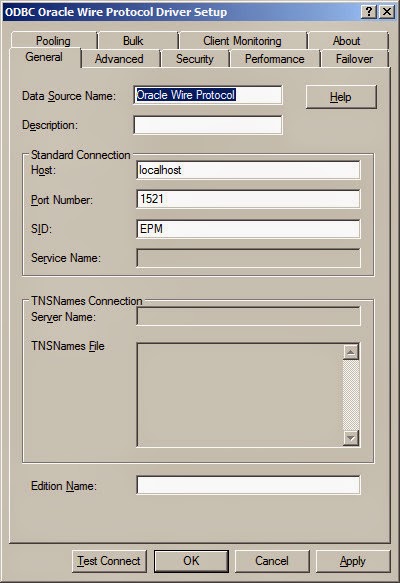
In the General Tab, input the Data Source Name, Host, Port Number and SID.

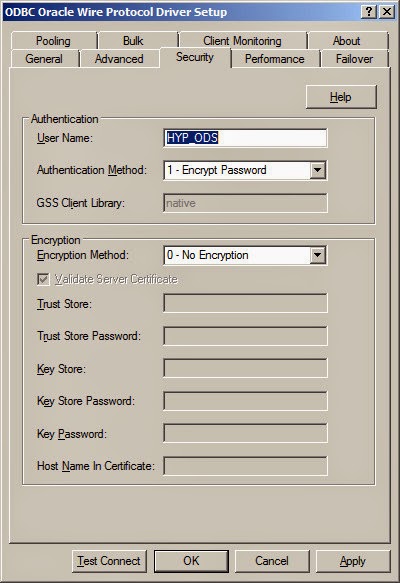
Switch to Security Tab, input the User Name here. And then click "Test Connect" for testing.

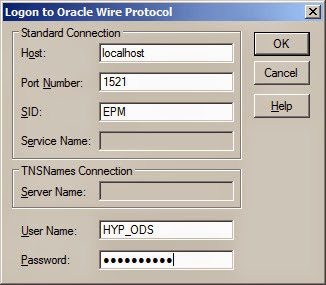
Input the Password and then click "OK"

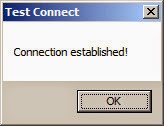
It shows the following message if the information is correct. Click "OK" to continue.

Click "OK" to confirm, and then you can find the new added data source.

  • Configuring Data Sources on UNIX (Version 11.1.2.3)
In the UNIX server, open the $ARBORPATH/bin/.odbc.ini file and add or change the data source configuration. Make sure the data source name is under [ODBC Data Sources] and it invokes the correct database driver. For example.

[ODBC Data Sources]
Oracle Wire Protocol=DataDirect 6.1 Oracle Wire Protocol

Roll down to the [Oracle Wire Protocol] part. If you have another name of the data source, copy this part of configuration and then rename it.

Change the configuration for the HostName, LogonID, Password, PortNumber and SID.

Then we can try to load data from SQL in EAS. Login to EAS, create a rules file for the target database.

Click File > Open SQL in the rules file.

Confirm the target database information and then click OK to continue.

You can find the SQL data sources you created before. Select Oracle Wire Protocol, input the SQL statement for the source data. And then click "OK/Retrieve" to retrieve data.


For Oracle database, you can use Oracle Call Interface (OCI) as an alternative to ODBC to significantly improve data load and dimension build performance. Use the following syntax for the Data Source Name: host:port/Oracle_service_name
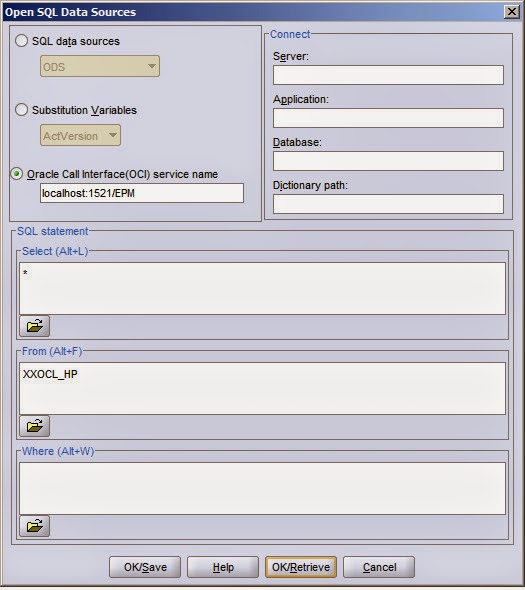

Input User name and Password for the SQL. Then click OK.

You can find the source data can be retrieved in the rules file. Actually, the field names of the SQL table will be generated to the field name of the rules file automatically. Click "Field Properties" to have a check.

You can do some simple mappings in the Global Properties Tab.

Switch to the tab "Data Load Properties", you can check or change the field definition here.

Press "Next >>" for the other fields, make sure to check the box "Data field" for the data field. Then click "OK" to continue.

Click "Data source properties" to change the data source properties, normally it doesn't need to change if the source is relational database. (It may need to change the settings for the flat file source.)

Click "Data load settings" for the data load configurations.

There are three data load options in "Data Load Values" tab, normally we use the setting of "Overwrite existing values". But in some cases if there are duplicated dimension combination records in the source data and we want to aggregate the data together, we use "Add to existing values" option.

If we want to clear data combinations before the data load, switch to the "Clear Data Combinations" tab. For the cases if the source data changed frequently and we need to reload data after the change, we will need to clear the existing data first and then reload the data again, make sure there is no dirty data left in the target environment. Select the Combinations to clear from the Dimension list and then continue.

"Header Definition" - If the number of fields of the source data is less then the dimension numbers of the target Essbase cube, you need to define the header definition. For example, if you have no version field in the source data, but you have the "Version" dimension in the target Essbase cube. Then you need to specify one of the version to load the data. (e.g. Final)

After all the settings are done in the rules file, you can save to continue.

Input the File name and click "OK"

Now we can load the data from the relational database with the saved rules file. Right click the target database, click "Load data..."

Select SQL as the Data Source...and then click "Find Rules File"

Select the rules file we created before.

Then scroll to the right of the Data Load setting, input the SQL User Name and Password, click "OK"

The data load log shows as below.

You can find the data was loaded to Hyperion Planning/Essbase successfully.

Next, we can try how to export Essbase data to relational database with DATAEXPORT command in a calculation script. First, create a calculation script as below.

We can export Essbase data to relational database with the following command. "Oracle Wire Protocol" is the ODBC driver we created before, and we also need to specify the table name, user name and password of the target database.

Save the script and then execute, you can find the data output to the relational database successfully.


Tuesday, November 11, 2014

Hyperion Planning - How to create Block

Block creation is always an issue for Planning or Essbase projects, you need to consider whether the block is existing in the business rules or calculation scripts. That's because the setting of the following option is set to off by default.


There are several ways to create blocks,
  1. Input data directly in web forms or Excel Smart View
  2. Data Load from ETL tools or EAS rules file
  3. Rollup in sparse dimension - CALC DIM, AGG, @IDESCNEDANTS...
  4. SET CREATENONMISSINGBLK ON;
  5. DATACOPY - The performance is much better than CREATENONMISSINGBLK command
  6. @CREATEBLOCK - this function is available from version 11.1.2.3
Here is an example for the function @CREATEBLOCK. Note that at the left hand side of the equal sign, it should be a sparse dimension member.

FIX (@Relative("AllChannel", 0))
 FIX (@Relative("AllProduct", 0))
  FIX ({Entity})
   FIX ({Years})
    FIX ({Scenario})
     "HSP_InputValue" = @CREATEBLOCK ({Version});
    ENDFIX
   ENDFIX
  ENDFIX
 ENDFIX
ENDFIX

Hyperion Planning - How to maintain Metadata

There are several different ways to maintain the metadata in Hyperion Planning

  1. HAL (Hyperion Application Link) - You can use it to maintain metadata in version 9 or lower
  2. DIM (Data Integration Management) - Informatica provides the Hyperion Planning adapter
  3. ODI (Oracle Data Integrator) - Will gradually replace DIM in the latest versions
  4. EPMA (Enterprise Performance Management Architect) - Maintain the EPMA master library and then deploy to Hyperion Planning
  5. Outline Load Utility (Command Line) - Load metadata with Planning utility after version 11
  6. Outline Load Utility (Planning UI) - Allows metadata to be imported or exported from the web interface after version 11.1.2.3
  7. Access to Planning Metadata in Smart View - Allows metadata to be maintained in Smart View after Planning Admin Extension installed in version 11.1.2.3

When you use Outline Load Utility command line to load the metadata (Method 5), you will find the parameters are so many and the operating is not very convenient. For example,

C:\EPM_ORACLE_INSTANCE\Planning\planning1>OutlineLoad /A:test /U:admin /M /N /I:c:\outline1_ent.csv /D:Entity /L:c:/outlineLoad.log /X:c:/outlineLoad.exc

Thus, I usually create another "my own" outline load utility in the planning implementation projects with windows shell scripts, or the linux one.

First, remote to the Planning application server and then locate to the Outline Load Utility folder. (Or some other path that you want to store the new utility file) Create a folder called "OutlineLoad". We will use "OutlineLoad.cmd" and "PasswordEncryption.cmd" in the later.

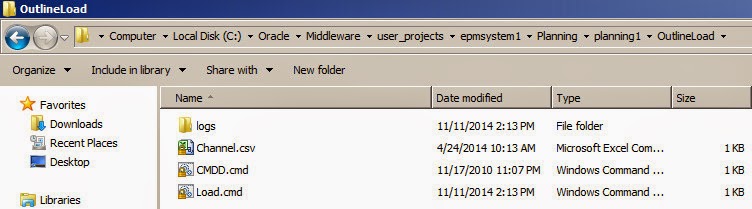
Create a folder called "logs" under the folder "OutlineLoad" and create two command files called "CMDD.cmd" and "Load.cmd".


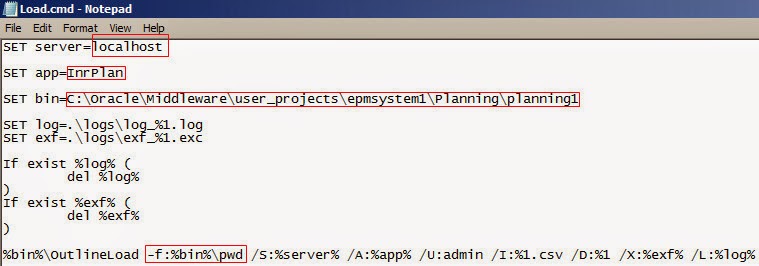
Edit the "Load.cmd" in Notepad, update the server, application name, "OutlineLoad.cmd" utility path. If you want to skip the password prompt, you need to use [-f:passwordFile] option as the first parameter in the command line. Next step will introduce how to generate the encrypt password file.


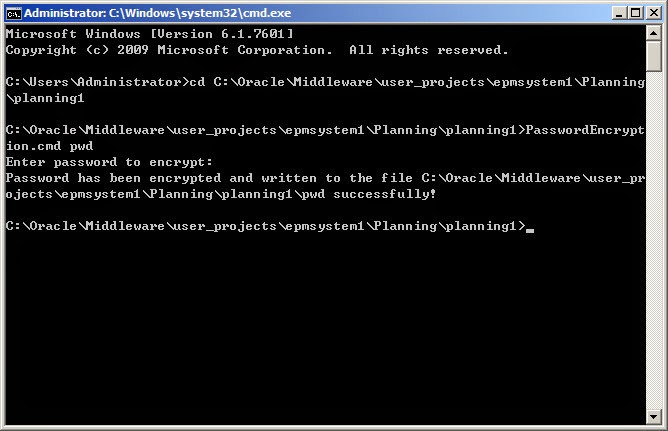
Open a command line window, locate to the PasswordEncrypt.cmd utility path. Input the command "PasswordEncryption.cmd passwordFile" as below.


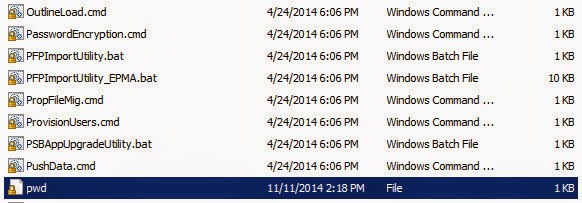
Then you can find the encrypt password file was generated successfully.

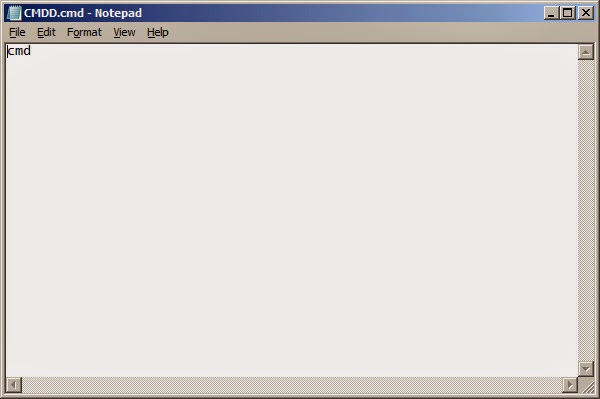
Edit the "CMDD.cmd" file in the OutlineLoad folder as below, it can help you to locate to the "Load.cmd" command folder easily.


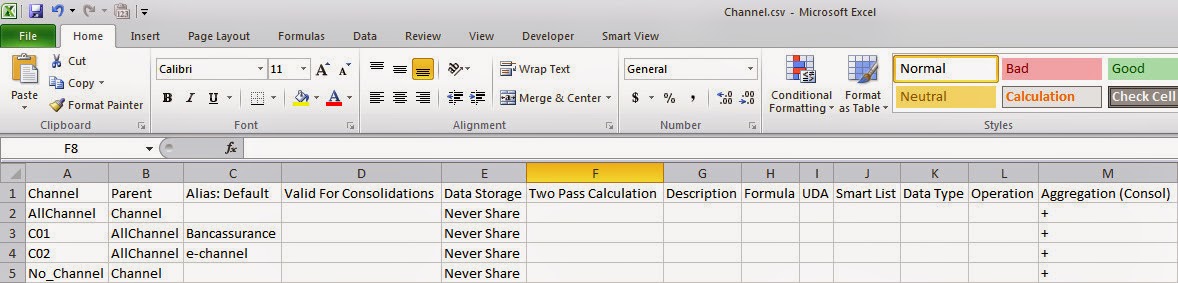
And then prepare the csv file for the dimension that you want to load, remember the file name should be the same as the dimension name with "csv" as the extension.


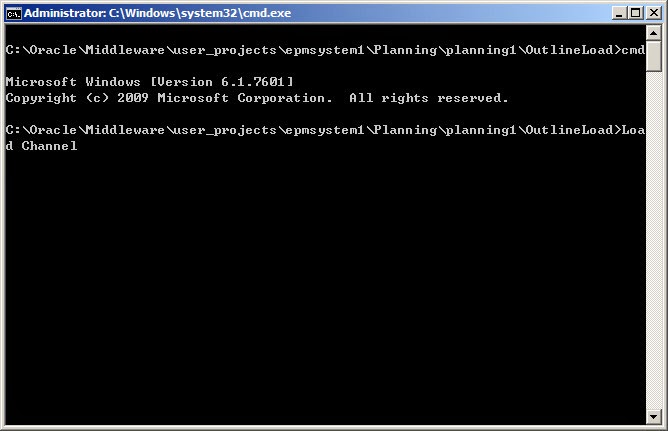
Double click the "CMDD.cmd" command to open a command line window, the path can be located to the custom "OutlineLoad" folder automatically. Then run the command "Load [Dimension Name]". This command will update the application specified in the "Load.cmd" file, the to be updated dimension is a parameter which we send to the "Load.cmd" command (Channel in this example) and the loaded file's name is the same as the parameter with csv as its extension.


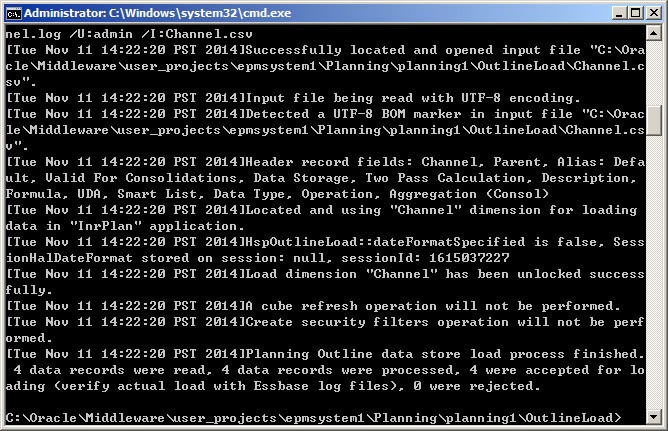
The metadata is loaded successfully.

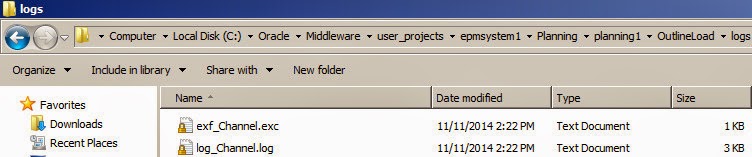
You can find the log and exception files in the "logs" folder.


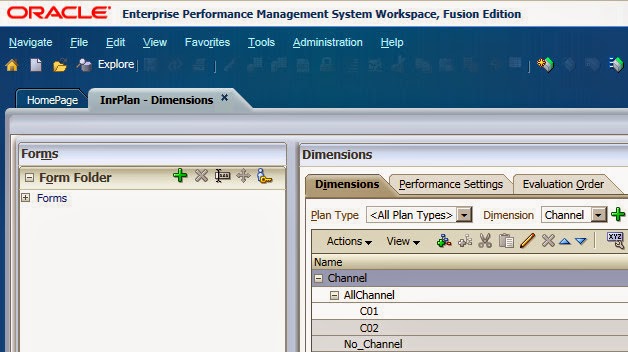
Open Planning Application and you can find the metadata is updated successfully.

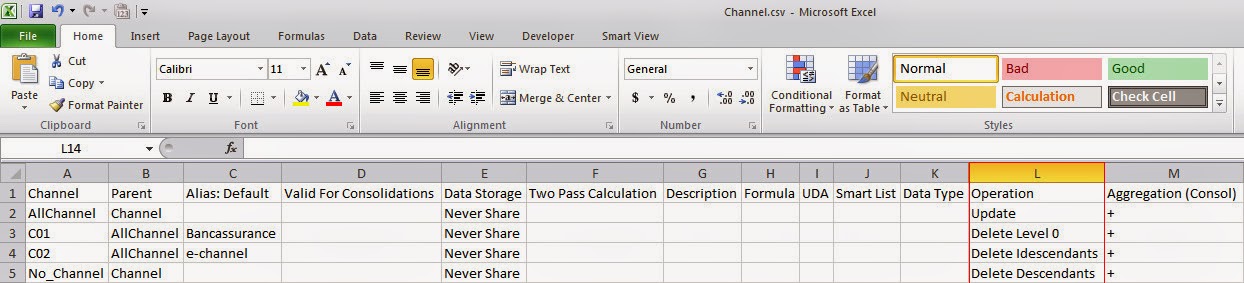
If you want to delete members with the "Load.cmd" file, just update the "Operation" column in the csv file. Examples are as below.


The Operation port takes any of the following values, the default value of this column is "Update".

  • Update – Adds, updates, or moves the member being loaded 
  • Delete Level 0 – Deletes the member being loaded if it has no children 
  • Delete Idescendants – Deletes the member being loaded and all of its descendants 
  • Delete Descendants – Deletes the descendants of the member being loaded, but does not delete the member itself 
You can use the same method to custom your "Export.cmd" file, also will rapidly improve your efficiency in the update of the Metadata. But of course from version 11.1.2.3, you can do that from Planning web UI directly, which you don't need to remote to the Planning server and do the jobs above!


Tuesday, July 1, 2014

FDMEE 11.1.2.3 (1) - Sample Application

After the PSU 11.1.2.3.500 is patched, we can create a sample planning application called "Vision". This sample application contains Hyperion Planning Application, Shared Services provisioning, Financial Reports, Calculation Manager and FDMEE.

FDM Classic last release is the 11.1.2.3.0 codeline. Beginning with the 11.1.2.4 version, FDM Classic will no longer be available, users will be required to move to FDM Enterprise Edition (FDMEE) in the 11.1.2.4 codeline. Today I want to introduce FDMEE for the sample application.

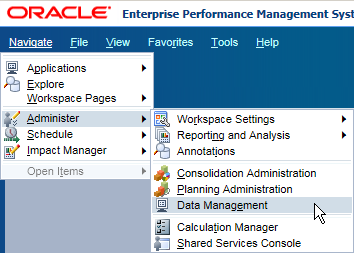
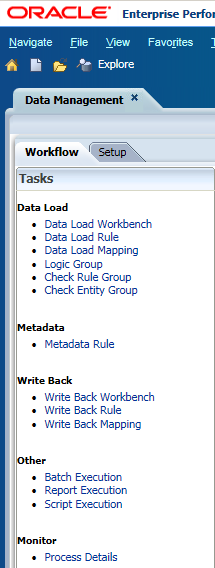
In Workspace, Navigate > Administer > Data Management. FDMEE starts from here, which called ERP integrator before.


There are two components in FDMEE, Workflow and Setup.


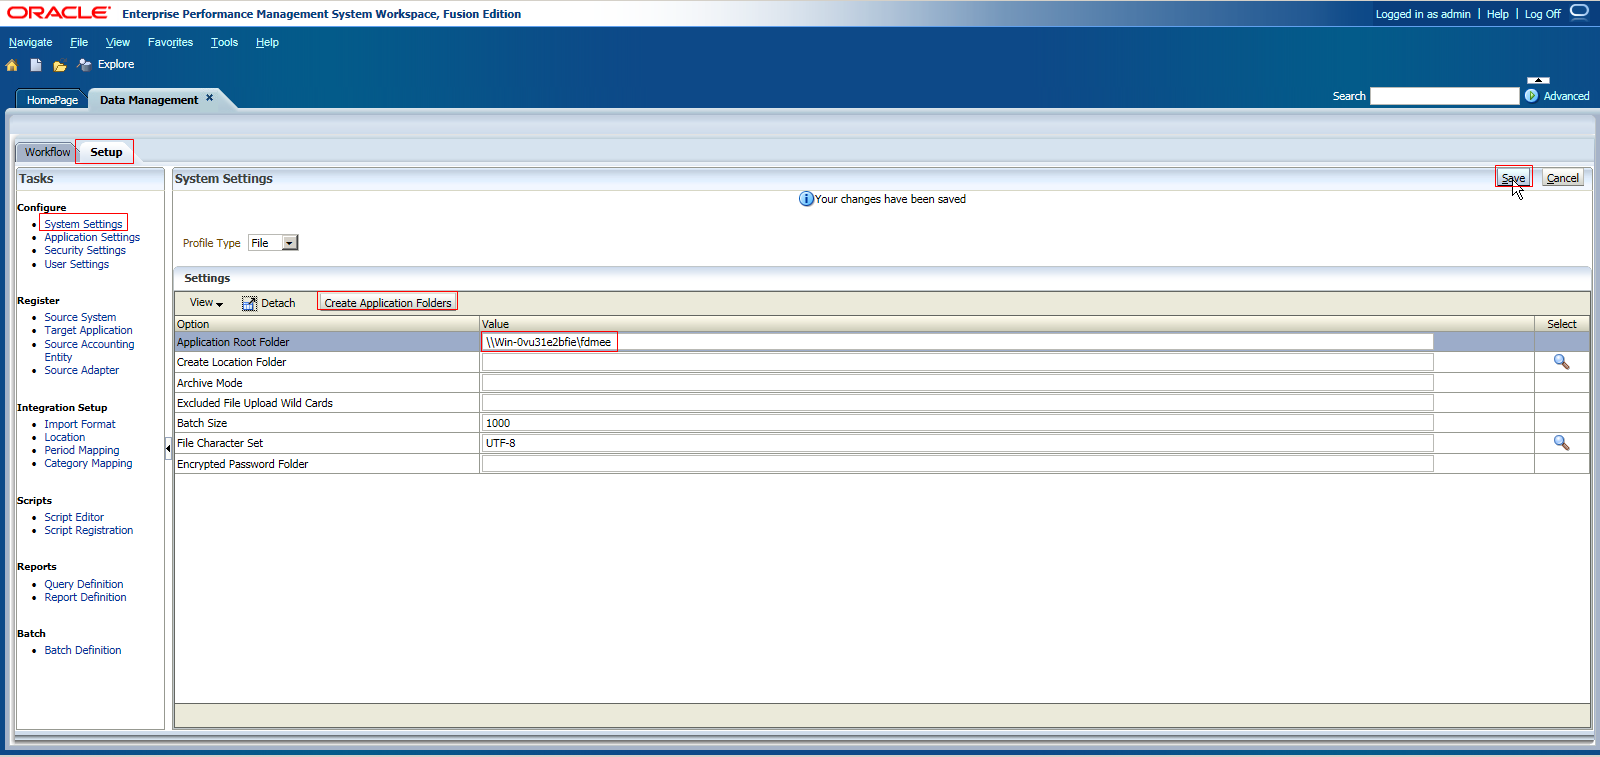
In the Setup Tab, click "System Settings" in Configure > Input Value for "Application Root Folder" > Click "Save" > Click "Create Application Folders"


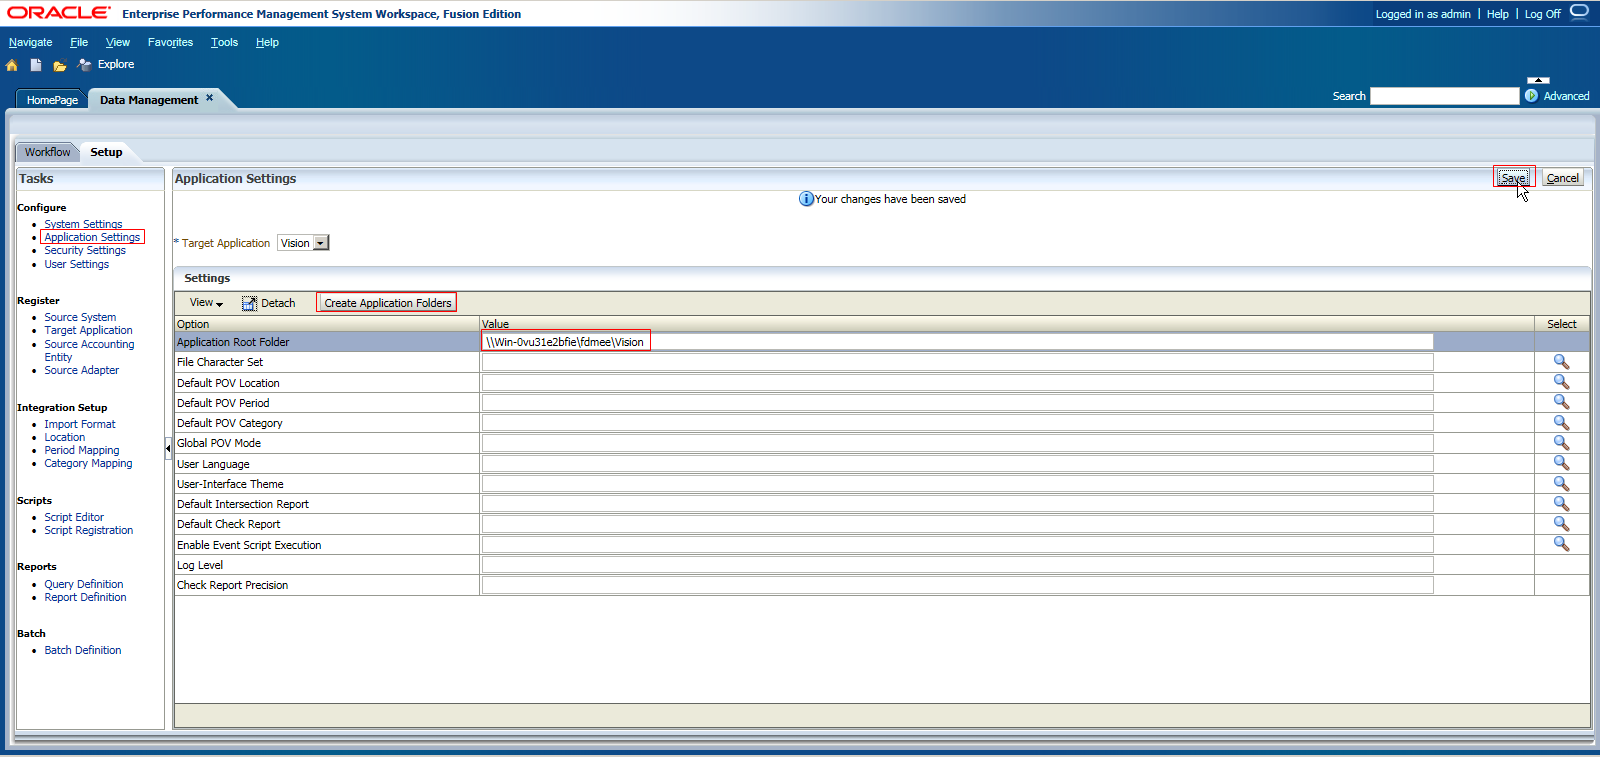
Click "Application Settings" > Input Value for "Application Root Folder" > Click "Save" > Click "Create Application Folders"


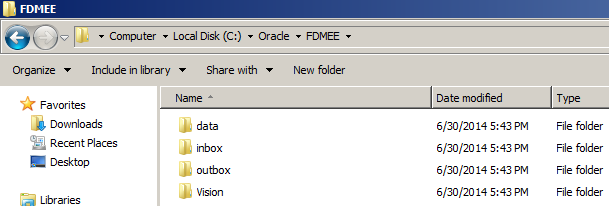
You can find the FDMEE related file folders are created in the specified path in the server.


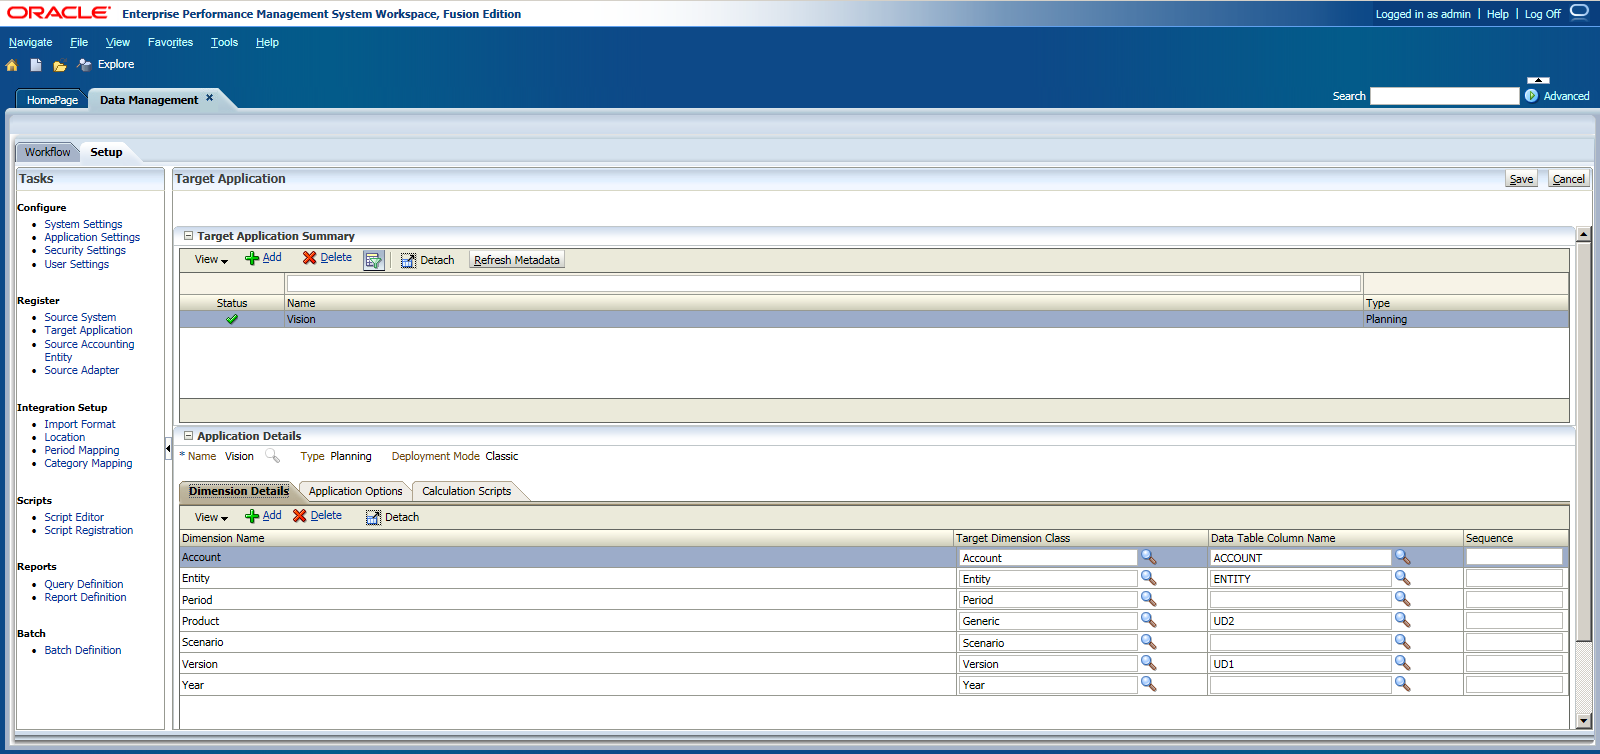
In the "Target Application" of Register, you can find the Dimension Details here.


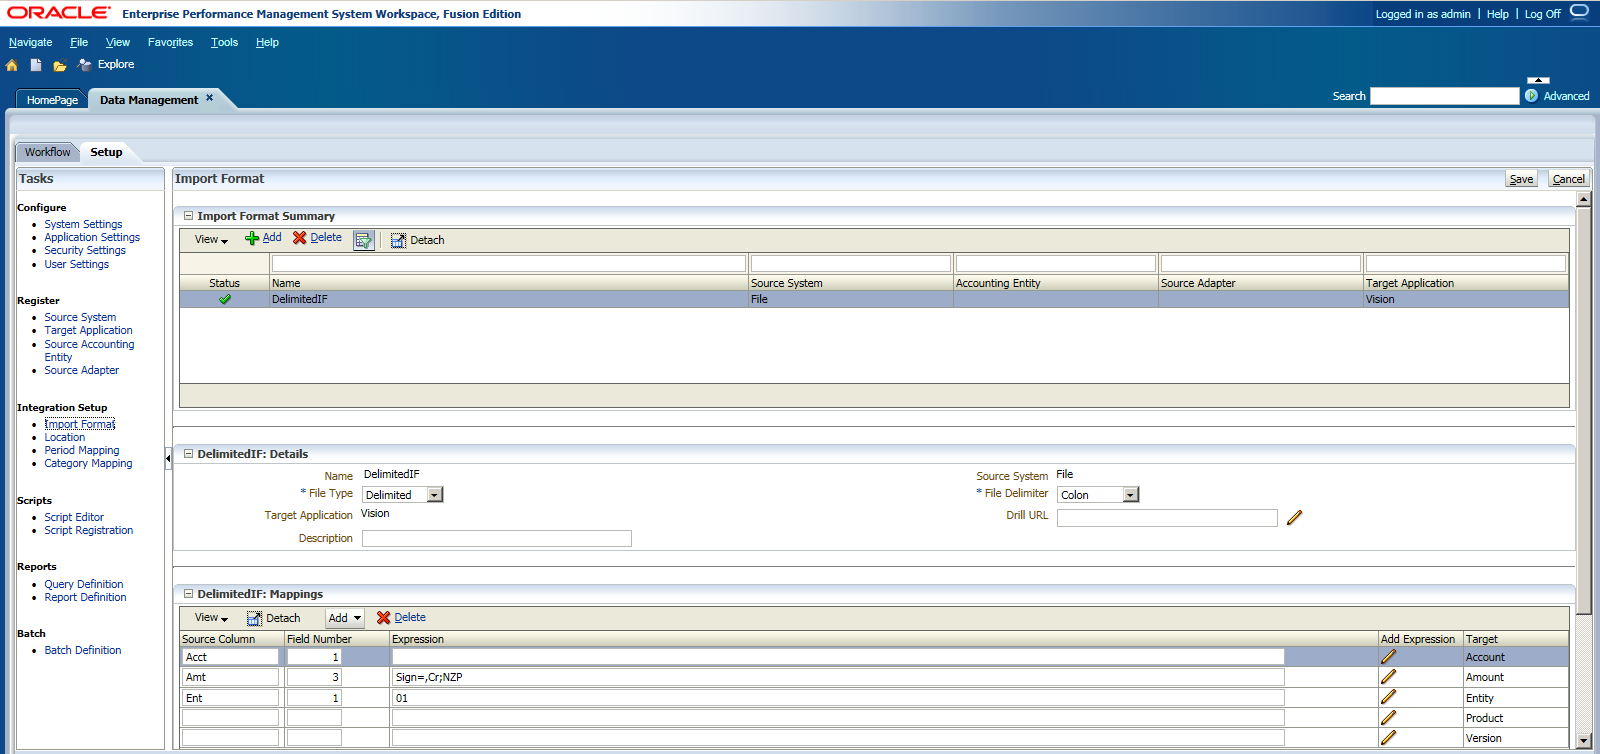
In the "Import Format" of Integration Setup, you can find the predefined Import Format settings. The Source System is File, file delimiter is Colon.


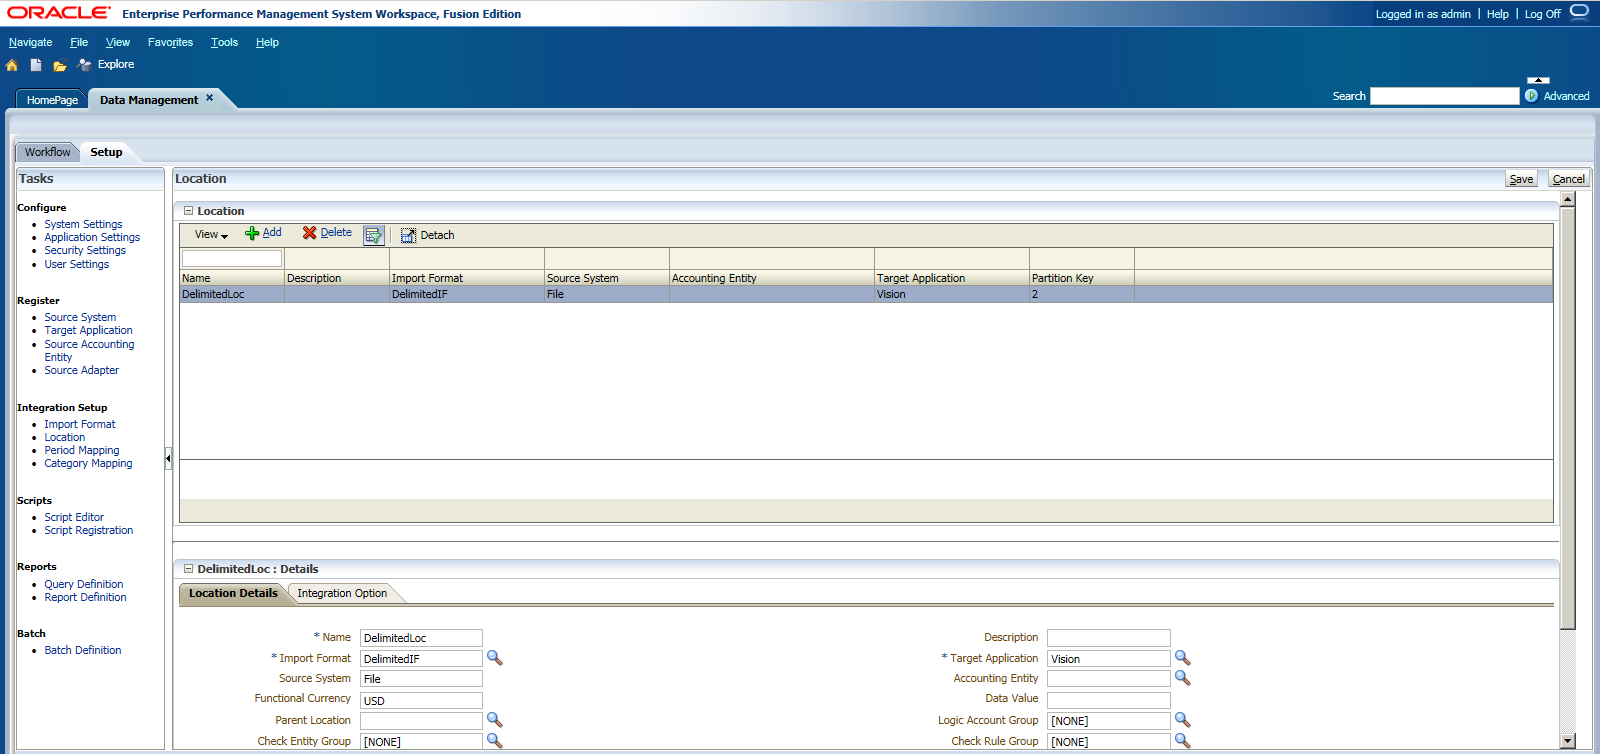
In the "Location" setting, you can find the Location Details.


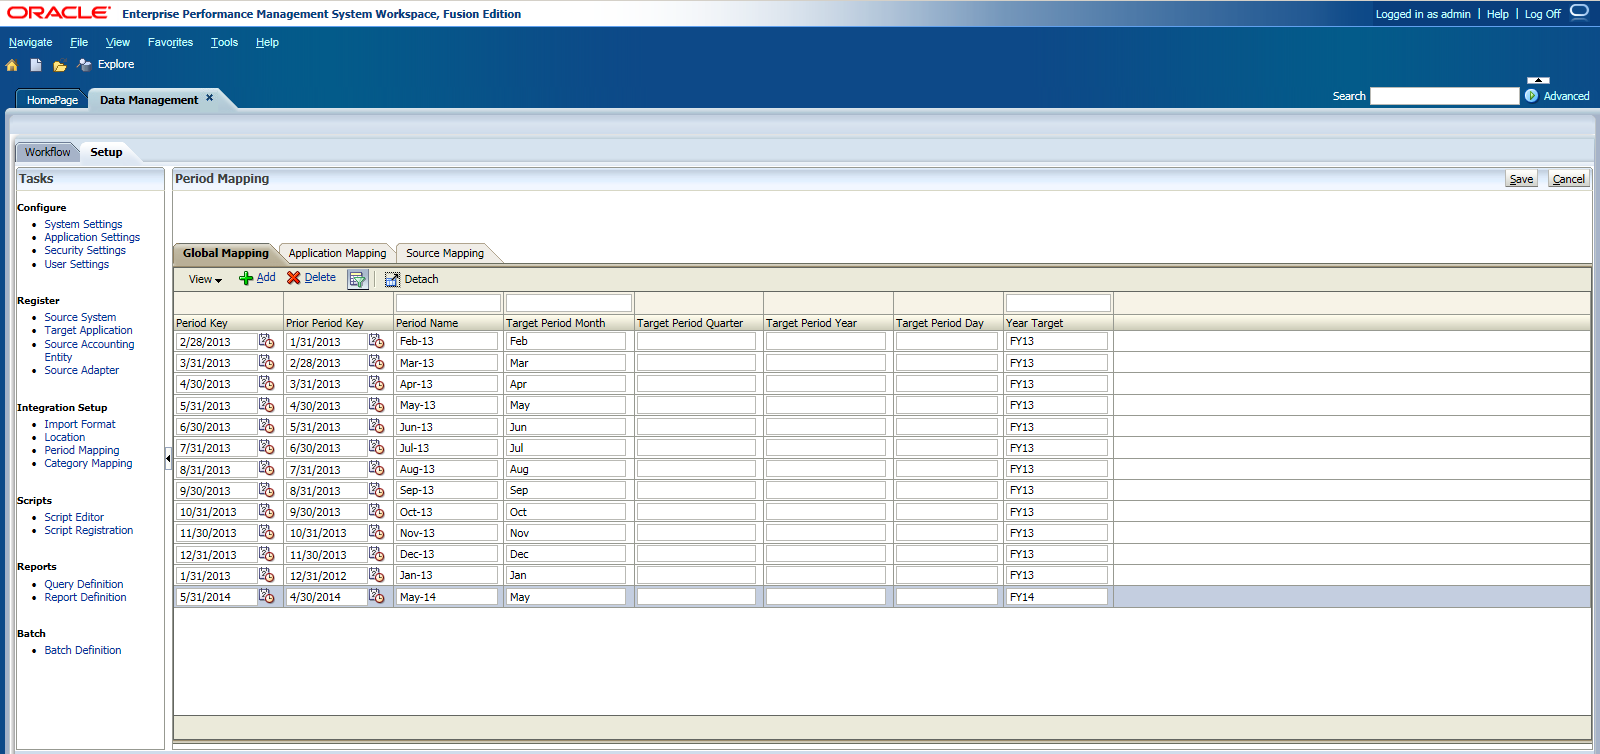
Period Mapping is as below.


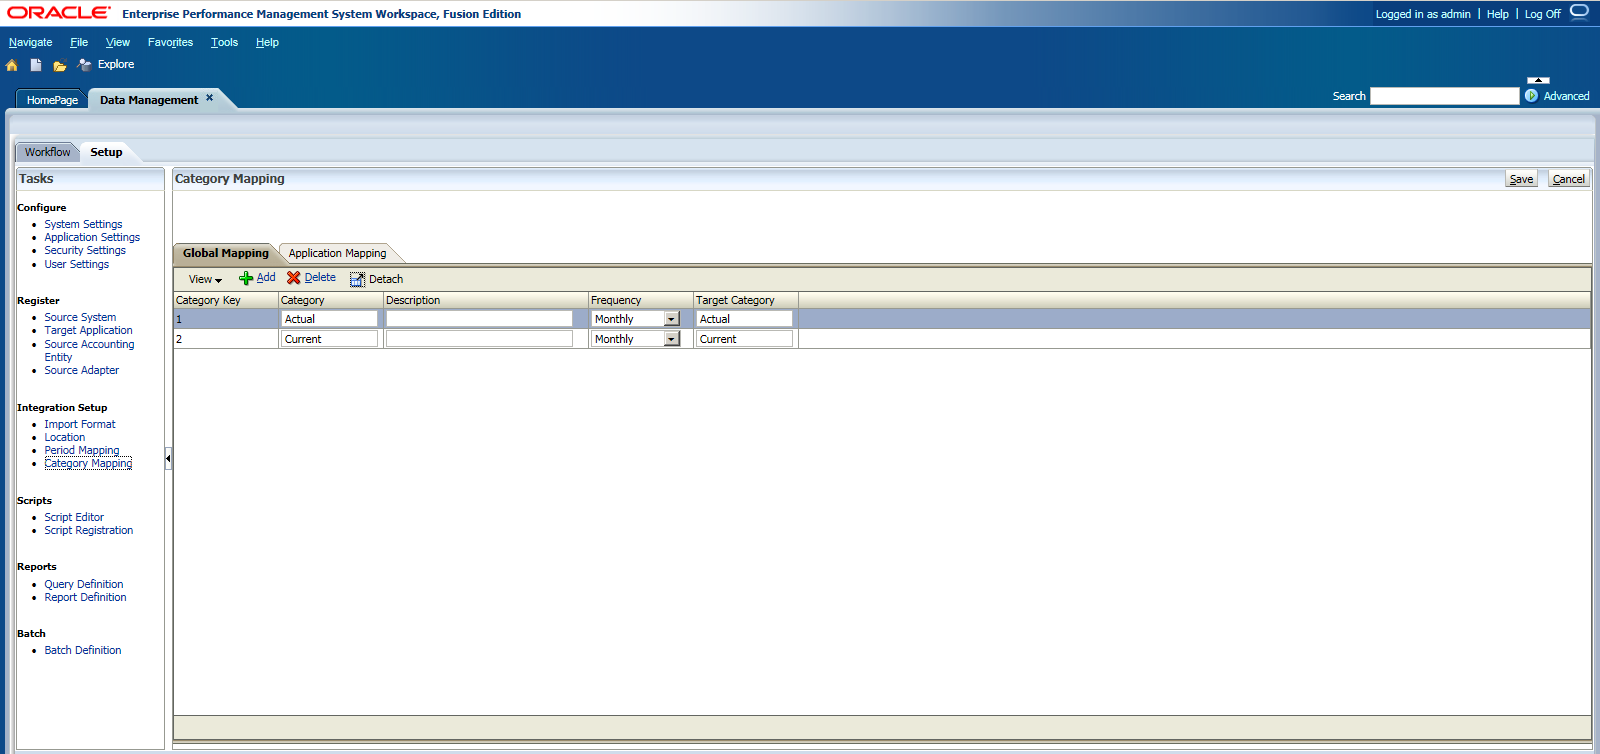
Category Mapping as below.


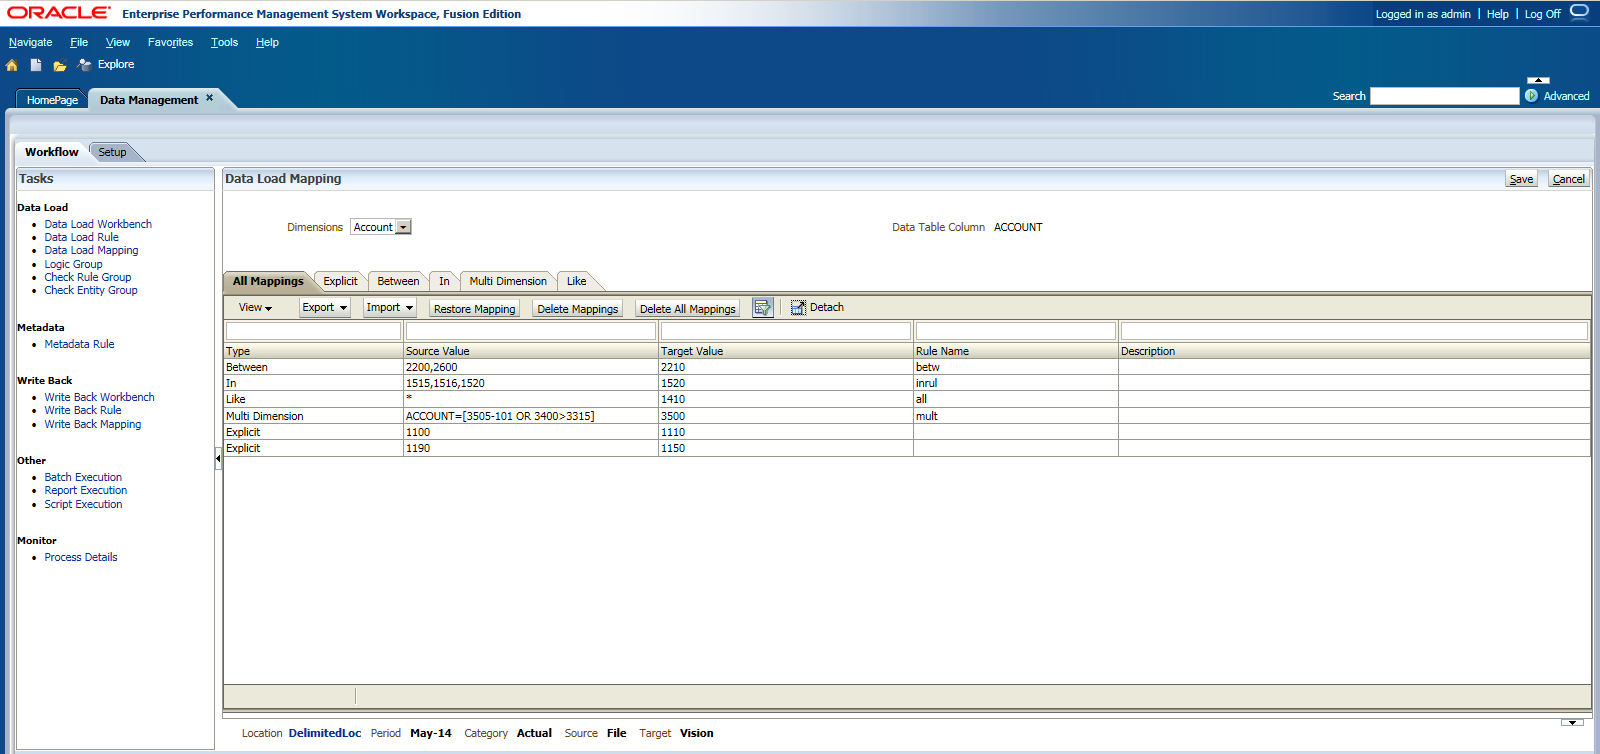
Now go back to the Workflow Tab, click "Data Load Mapping" in Data Load and you can find all the dimensions mappings here.


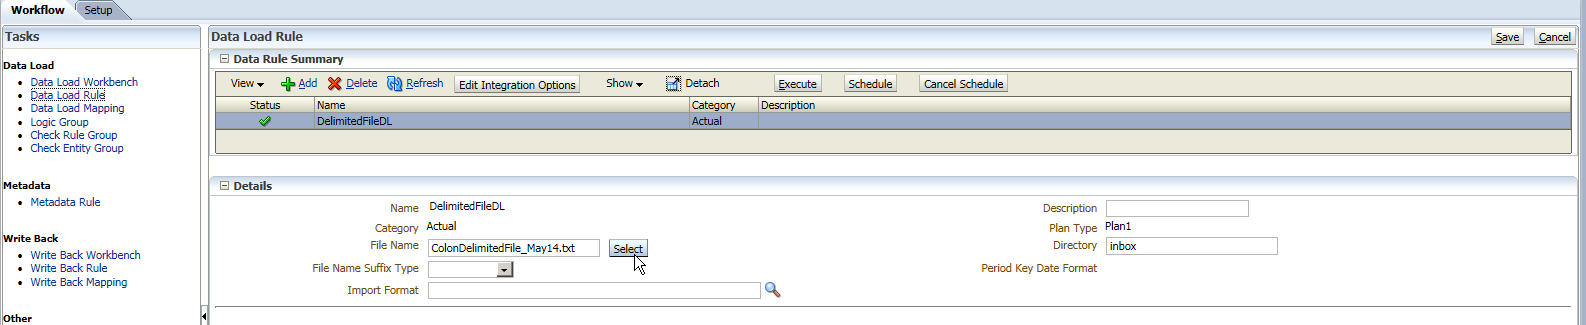
And then we will start to load the data, click "Data Load Rule" > Click "Select" to select the source file.


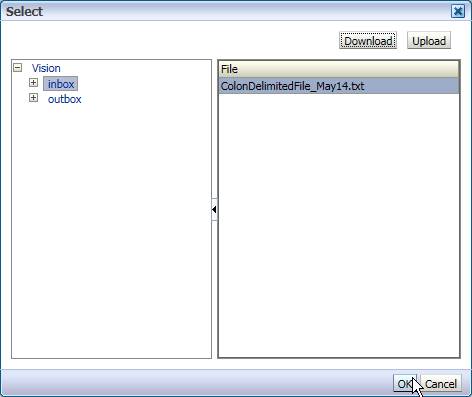
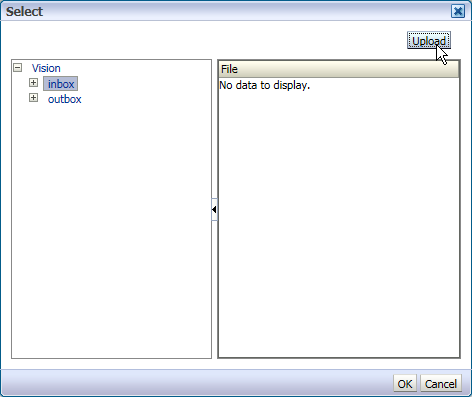
You can find there is no data file in the Inbox folder, click "Upload" to upload your local data file.


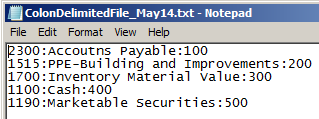
Based on the mapping settings, I prepared a simple data file for demo purpose.


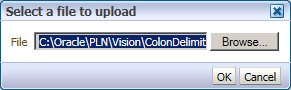
Select the file to upload, click OK


You can find the file was uploaded to the Inbox Folder, click OK to continue.


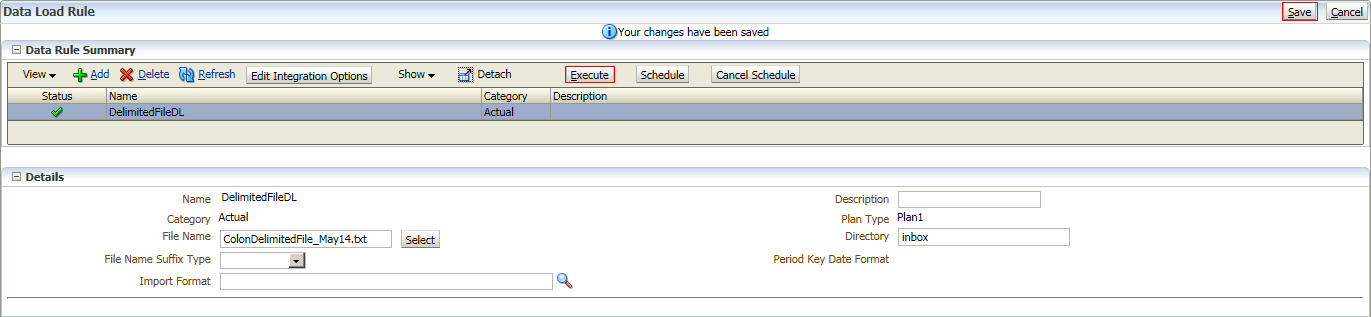
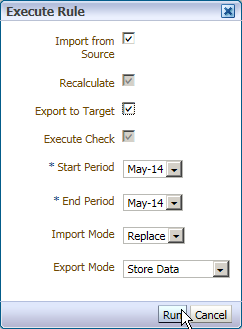
Click Save to save the setting > Click Execute to launch the data loading


Check "Import from Source" and "Export to Target", and then click "Run"


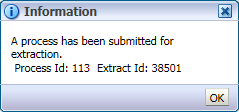
An information come out, click OK.


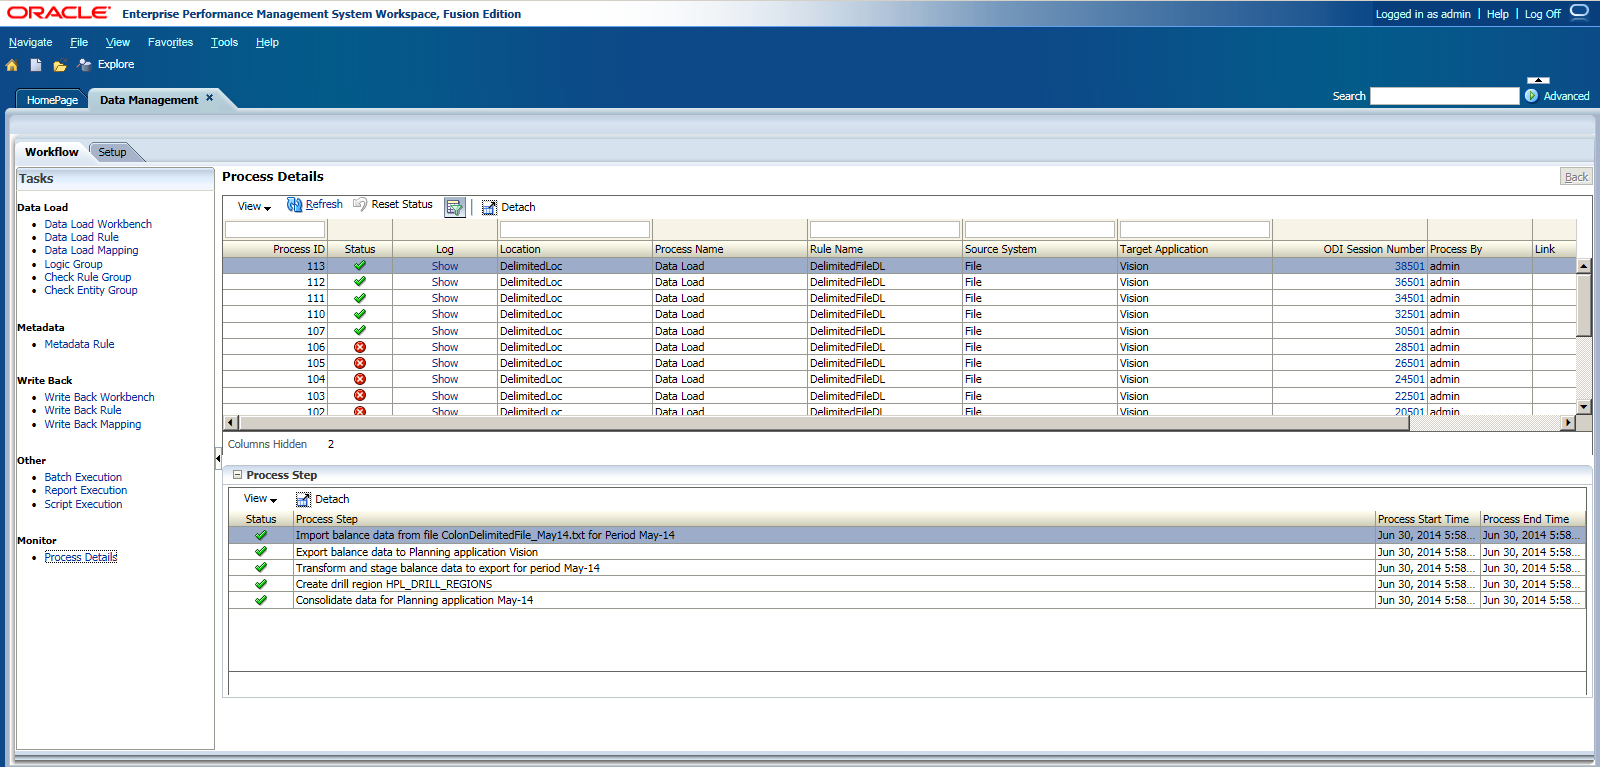
Click "Process Details" in Monitor, you can find the status for Process ID 113.


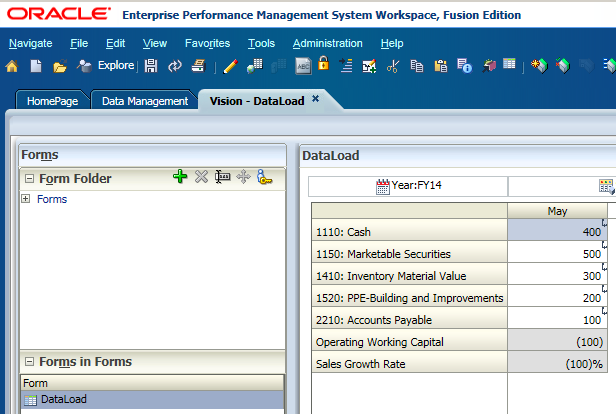
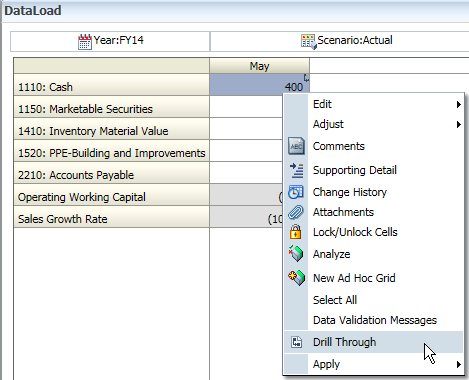
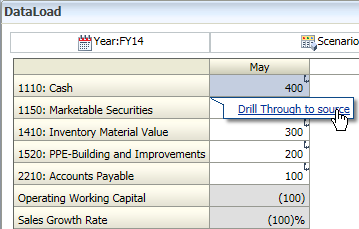
Then we can go to Planning Application "Vision" to check the Data Load details. You can find the data was loaded to the Planning Application successfully. And there is a small icon in each of the data load cells, which is an indicator showing the data is loaded from FDMEE and it can be drilled back.

Right click of the data cell > Click "Drill Through"


Click the link "Drill Through to source"


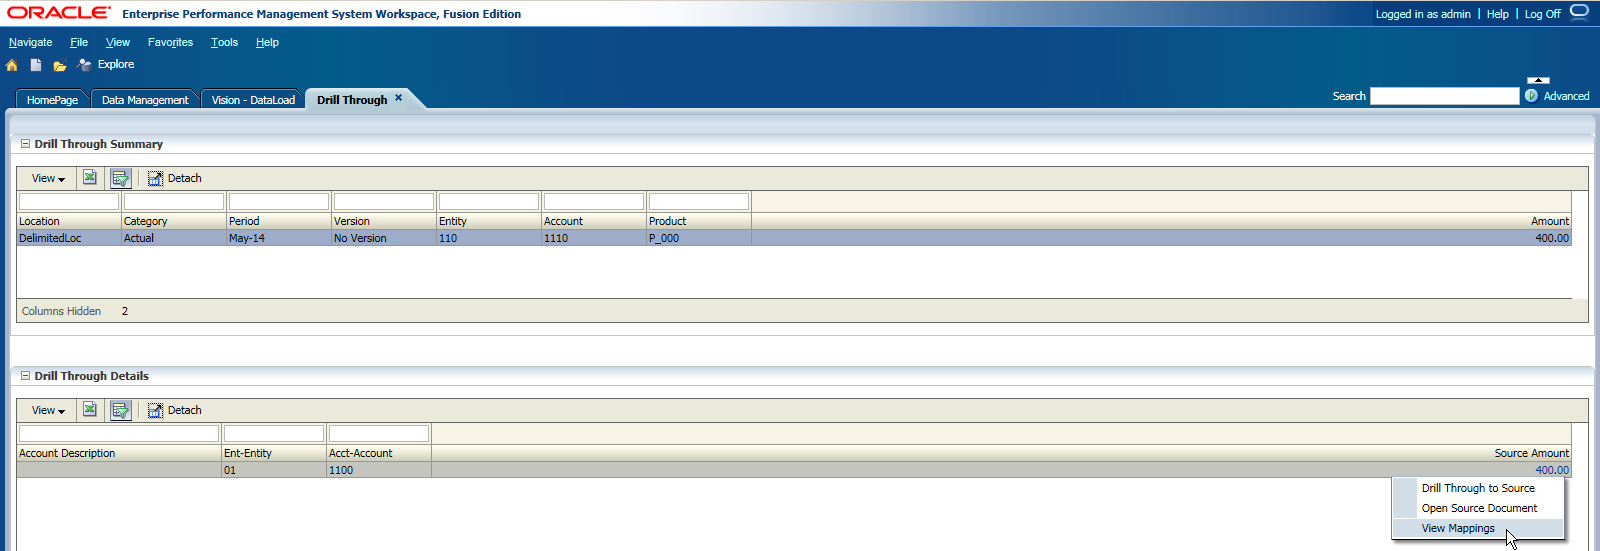
 Then there is a new tab called "Drill Through" opened, showing the drill through details. Click on the Source Amount, you can
  • Drill Through to Source: If your source system is ERP, you can drill through to your source ERP system
  • Open Source Document: If your source system is a file, you can open the source file
  • View Mappings: view the mappings


Click "View Mappings", you can find the dimension mappings.